 Skip to Navigation
Setup Examples: Docker on AWS Linux VM
In this walkthrough we will setup RavenDB using Docker on an AWS EC2 t2.micro virtual machine running Ubuntu 16.04.
We will go through the necessary steps that are required for RavenDB to run securely including how to configure RavenDB with the correct IP addresses and ports.
It's recommended to read the Setup Wizard section where you can find a detailed explanation about the RavenDB setup process.
Create the VM
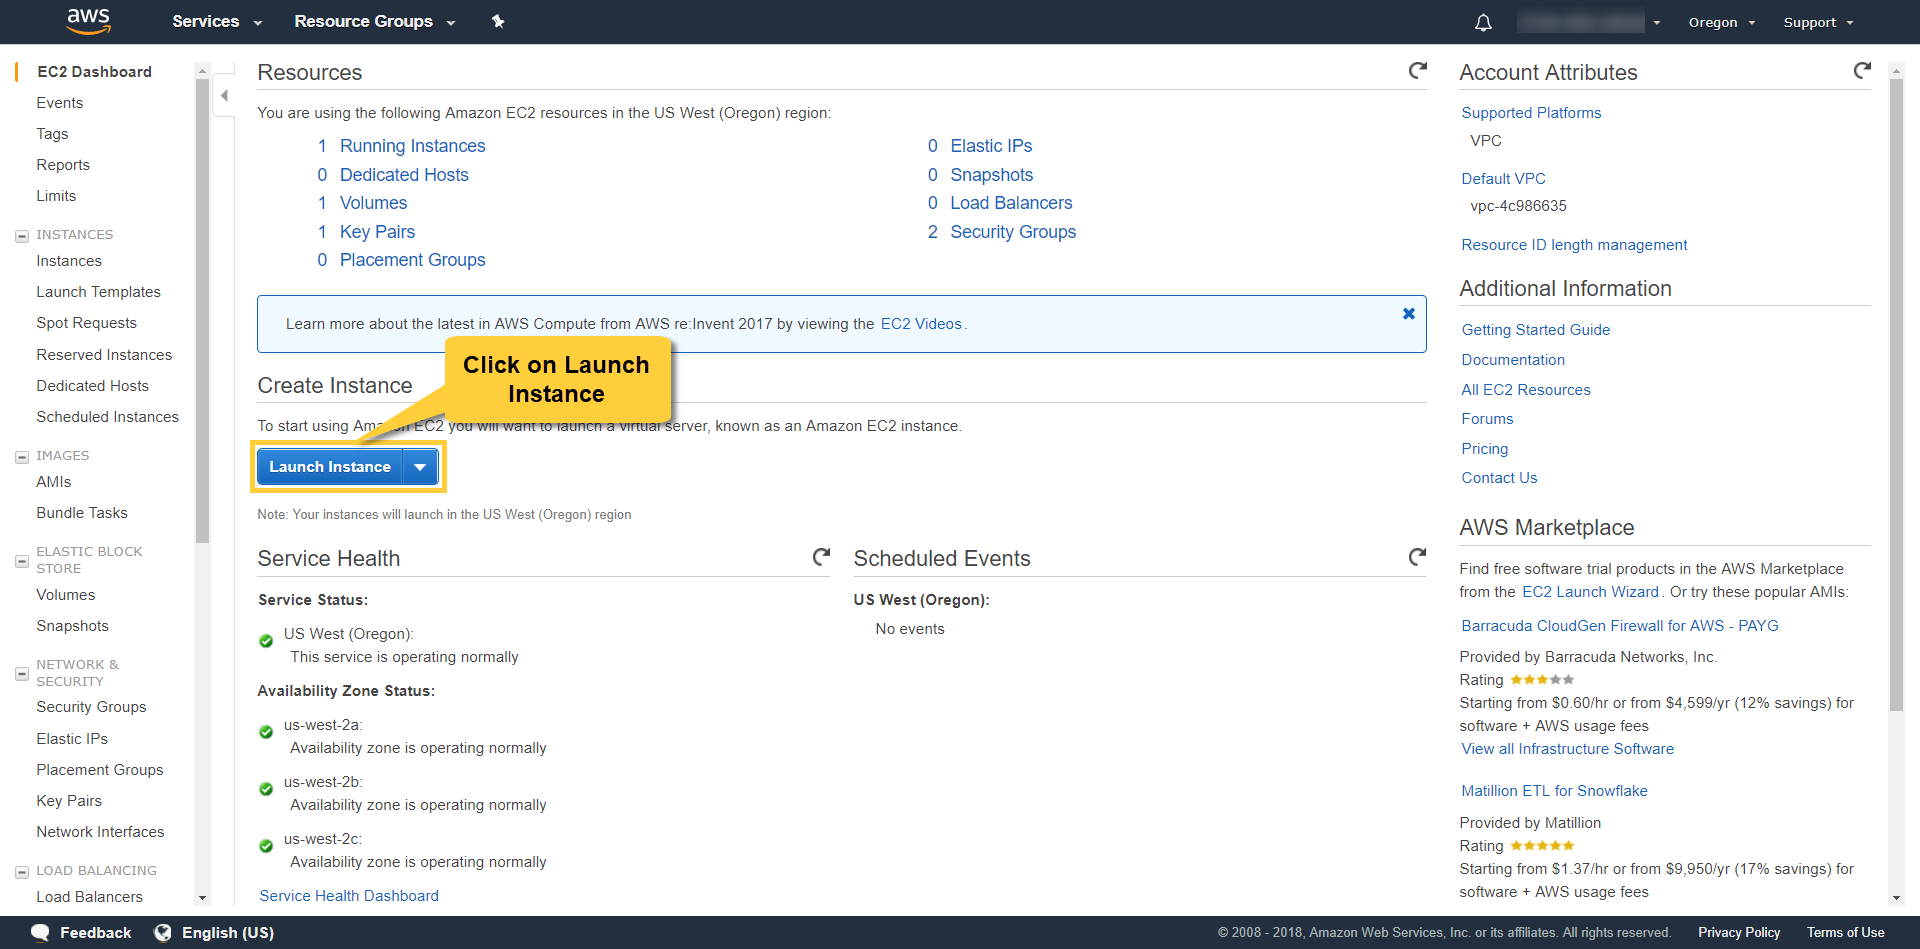
Access the EC2 Dashboard, and click on Launch Instance.
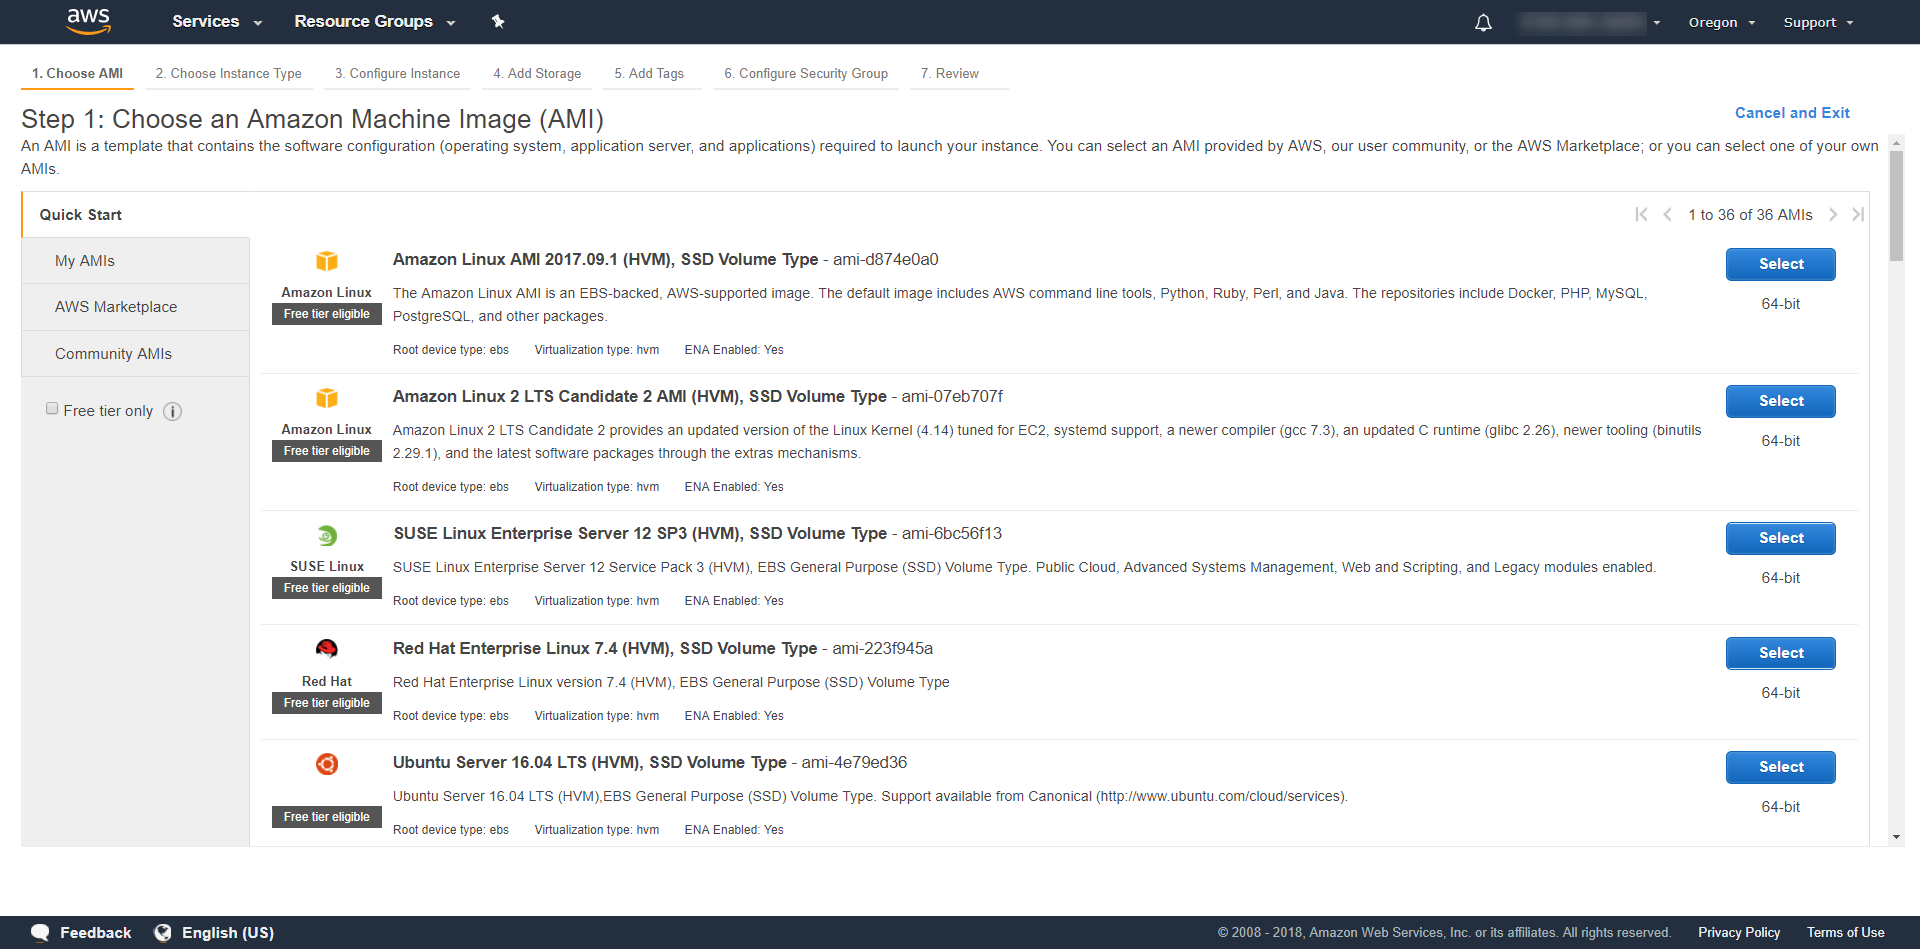
Select your operating system. In our example we choose "Ubuntu Server 16.04 LTS (HVM), SSD Volume Type".
Select the machine type. We choose the t2.micro with 1 core and 1 GB of memory.
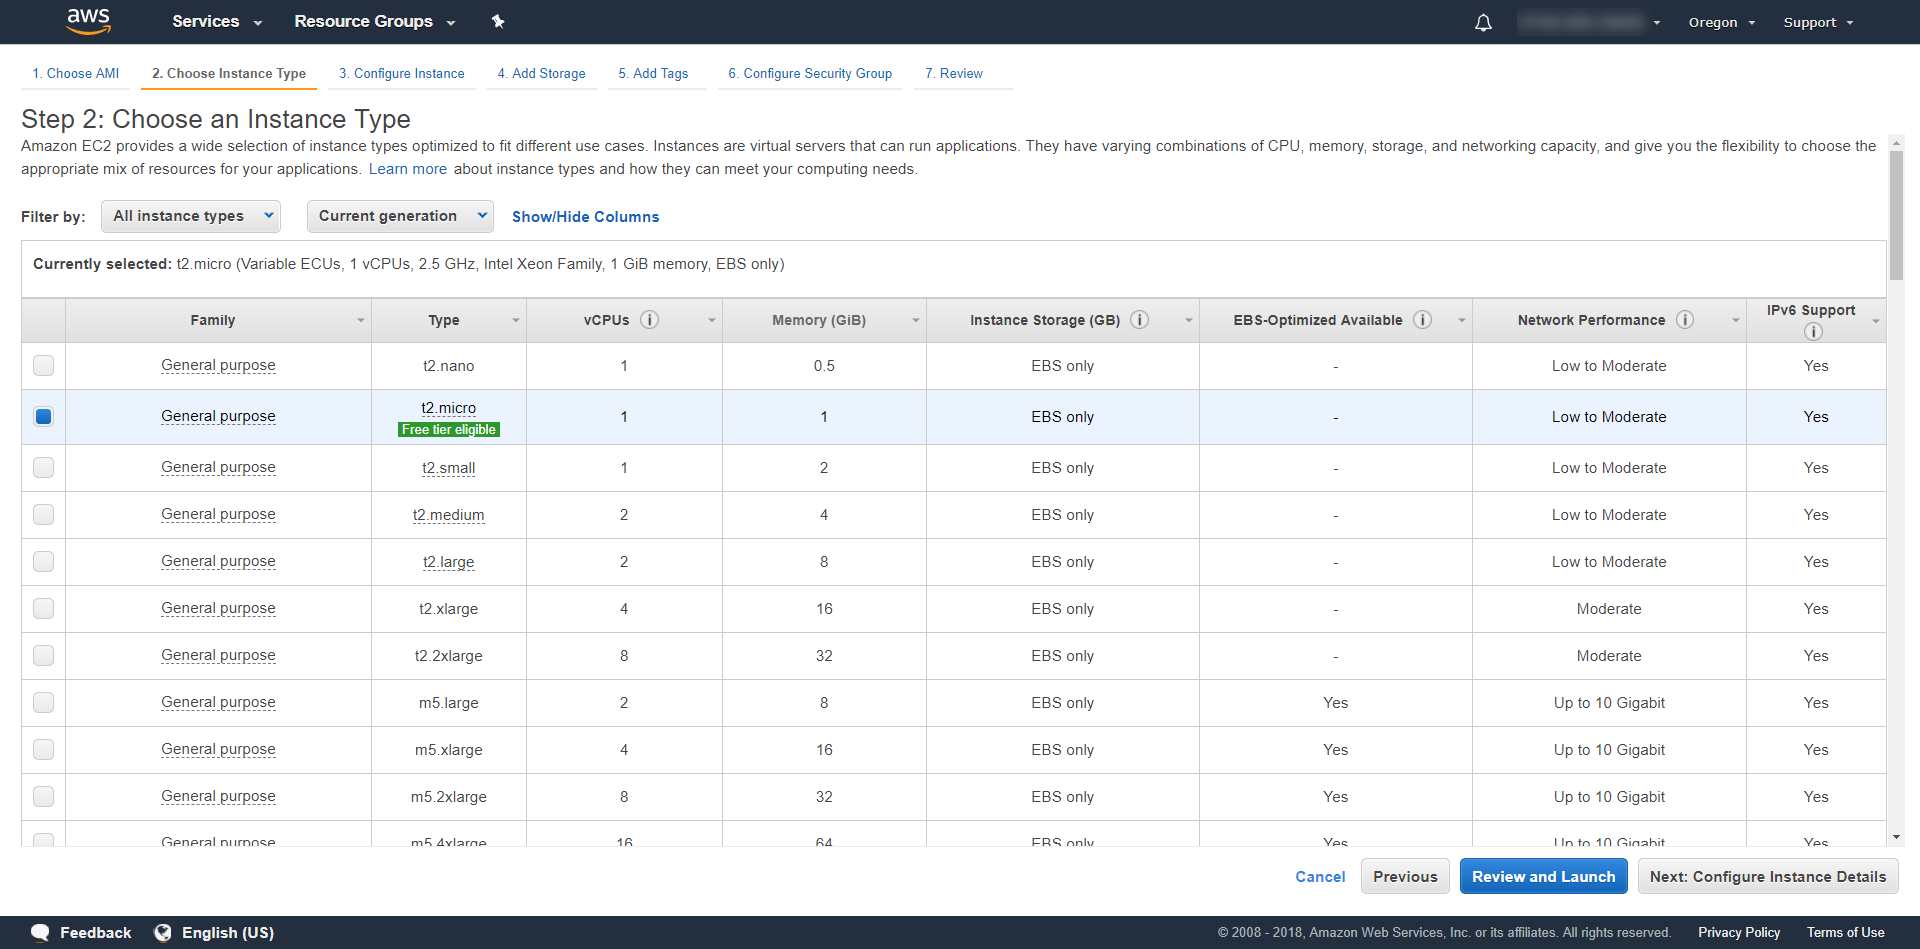
We stick with the basic default settings of the machine and configure just the minimal requirements for RavenDB. You would probably want to go over the entire set of options and customize your VM.
Security Concerns
The following settings are fine if you just want to experiment with RavenDB, however when security is needed you should set proper firewall rules and restrict access by IP. Please visit the AWS security documentation for more information about securing your VM.
Elastic IP address
By default, in AWS, an instance is assigned an IP addresses through DHCP. When the DHCP lease expires, or you restart the instance, this IP is released back to the pool and you will have to re-configure the RavenDB IP address. To solve this problem, use an Elastic IP address which doesn't change, and can even be dynamically re-assigned to other instances as you wish.
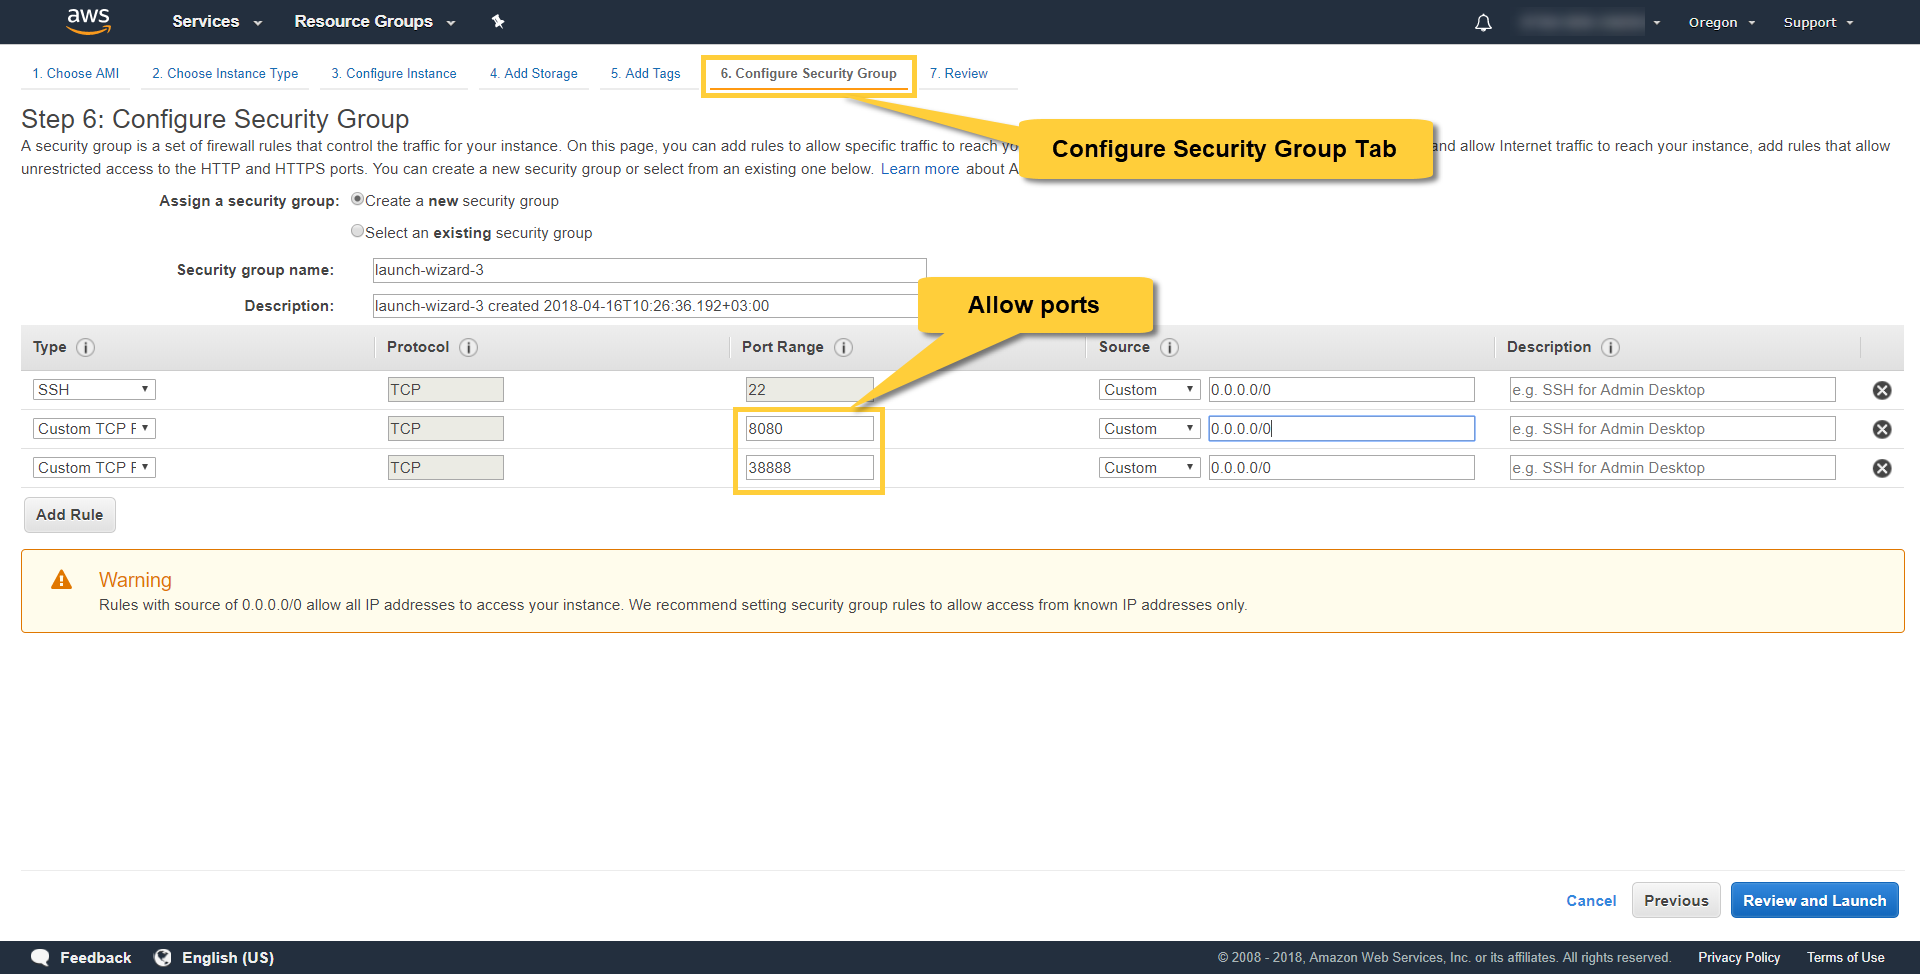
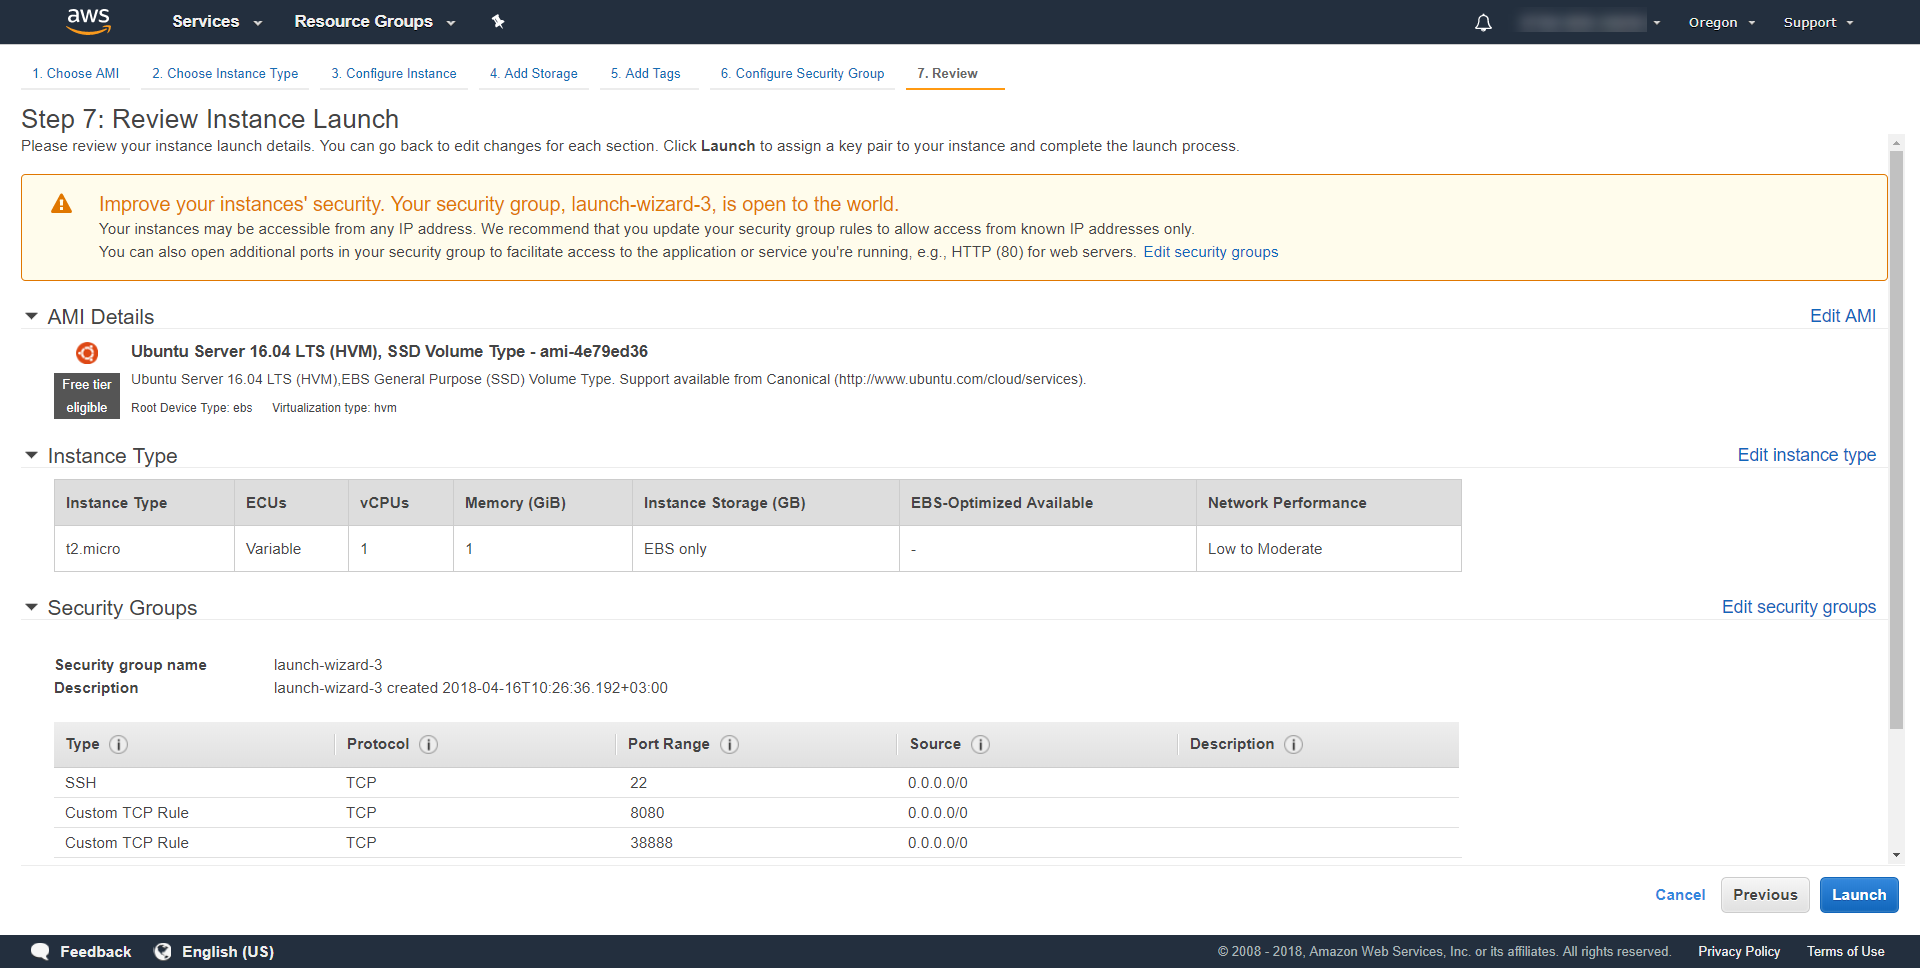
Let's open ports 8080 and 38888 for use by RavenDB. You may choose other port numbers off course and restrict access by IP. RavenDB will use port 8080 for HTTPS requests and port 38888 for TCP connections. We allow all incoming traffic on these ports by using 0.0.0.0.
Review your settings and launch the VM.
You will have to download a key pair which will be used later to connect to the machine using ssh.
Wait a couple minutes for the machine to initialize and click connect.
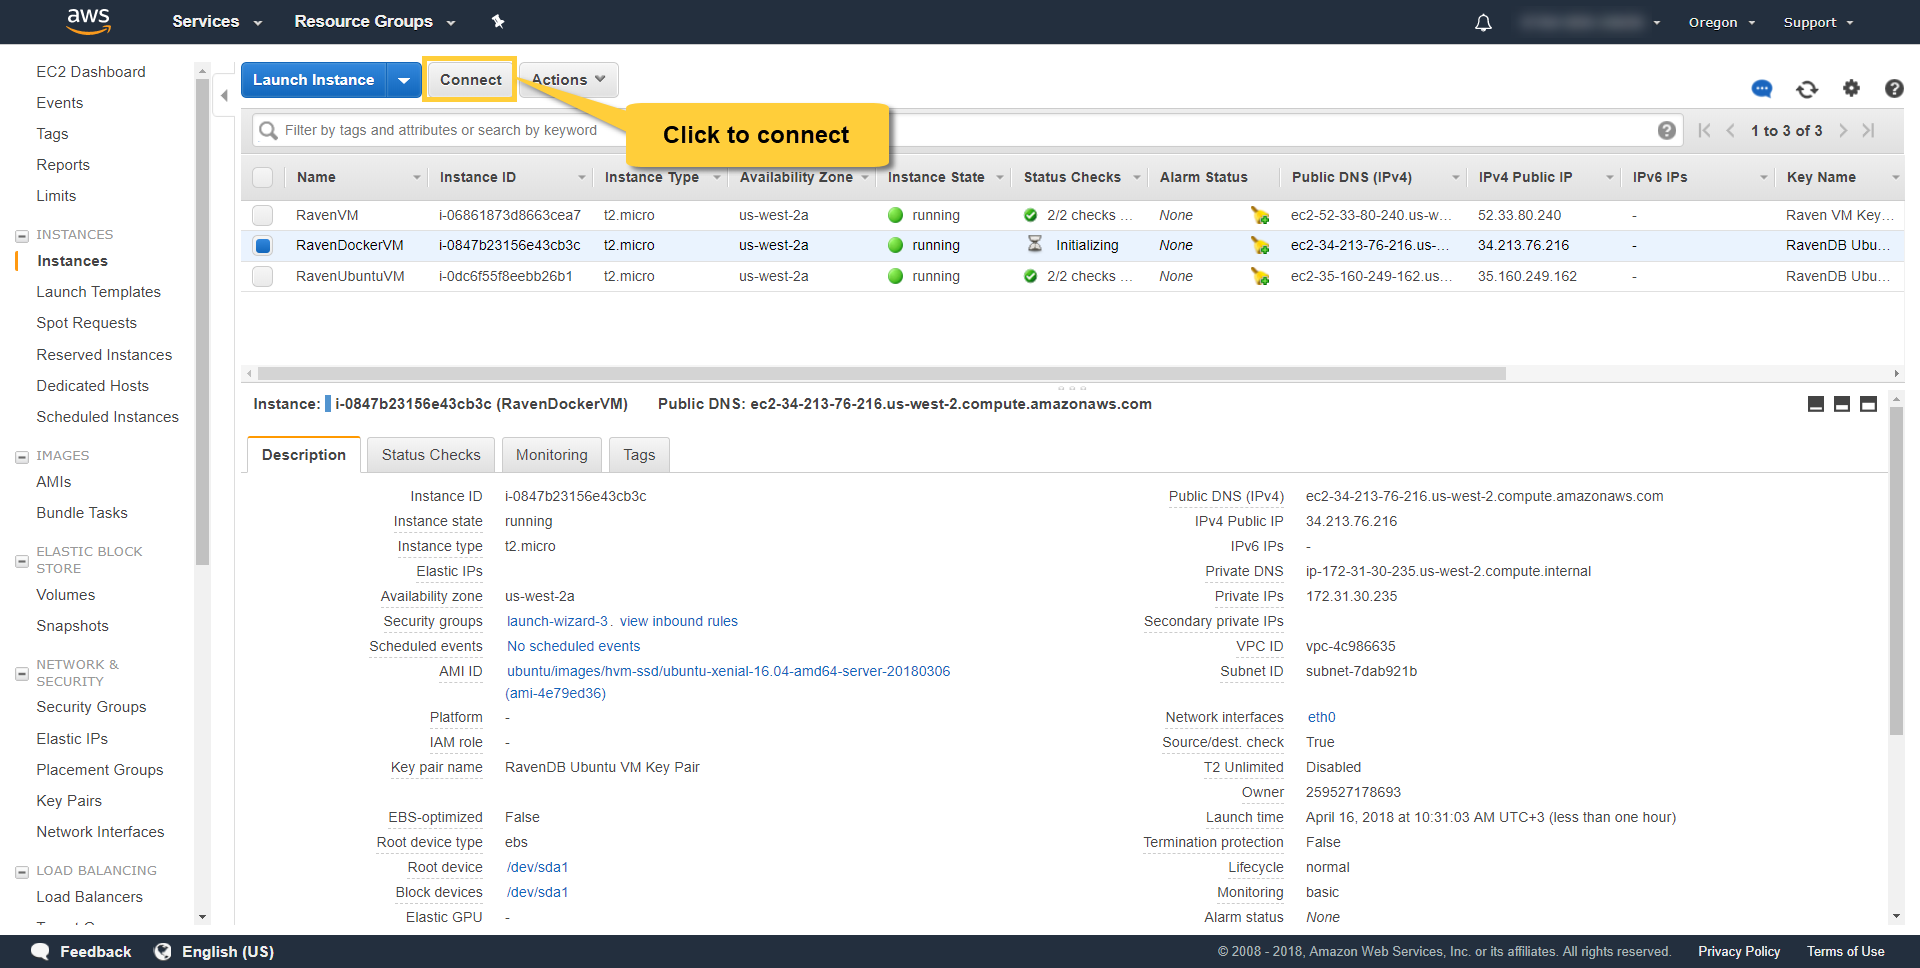
Follow the instructions and connect to the new machine using ssh.
ssh -i "RavenDBUbuntuVMKeyPair.pem" ubuntu@ec2-54-200-27-219.us-west-2.compute.amazonaws.comConfigure the VM
Let's update the OS and install Docker. In Ubuntu it looks something like this:
curl -fsSL https://download.docker.com/linux/ubuntu/gpg | sudo apt-key add -
sudo add-apt-repository "deb [arch=amd64] https://download.docker.com/linux/ubuntu $(lsb_release -cs) stable"
sudo apt-get update
sudo apt-get install -y docker-ce
Run the following command to create a new RavenDB container. For more information visit the Docker documentation section.
sudo docker run -d --name raven4 -p 8080:8080 -p 38888:38888 ravendb/ravendbUse this command to view the status of your containers
sudo docker psWith the following command, you can view the full details of the container. Notice the IPAddress field (e.g. 172.17.0.2). This is the private IP address that RavenDB binds to inside the container. You will use this address later in the wizard.
sudo docker inspect raven4You can connect to the container using
sudo docker exec -it raven4 bashAnd then you can connect to the RavenDB CLI using:
./rvn admin-channelRun the RavenDB Setup Wizard
You have a few choices on how to run the RavenDB server. We will use the Setup Wizard, but you can also configure things manually.
RavenDB is running and you can access it from your (local) browser using the VM's Public DNS (e.g. http://ec2-54-200-27-219.us-west-2.compute.amazonaws.com:8080).
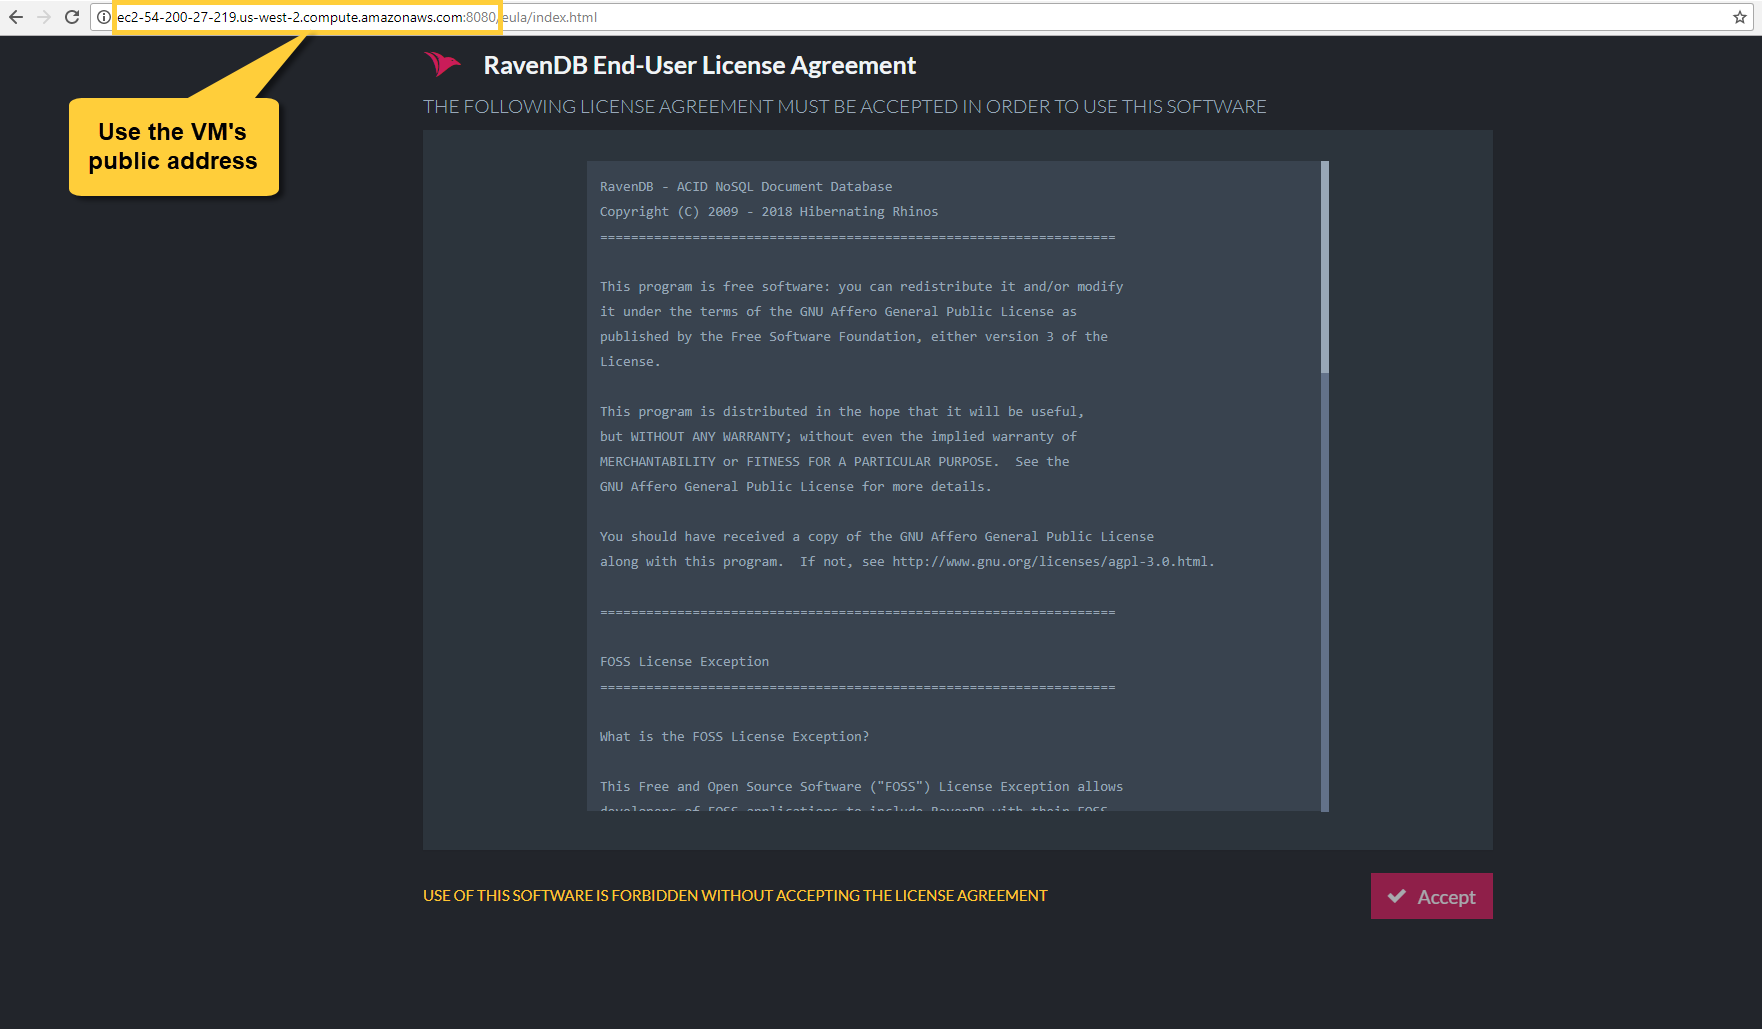
Accept the agreement and choose the setup type you want to do. In the example we choose to setup securely with a Let's Encrypt certificate. You will need to claim your domain, read more here.
When you reach the point where you have to enter the IP addresses, you can go to the EC2 management console and check the machine's public IP address.
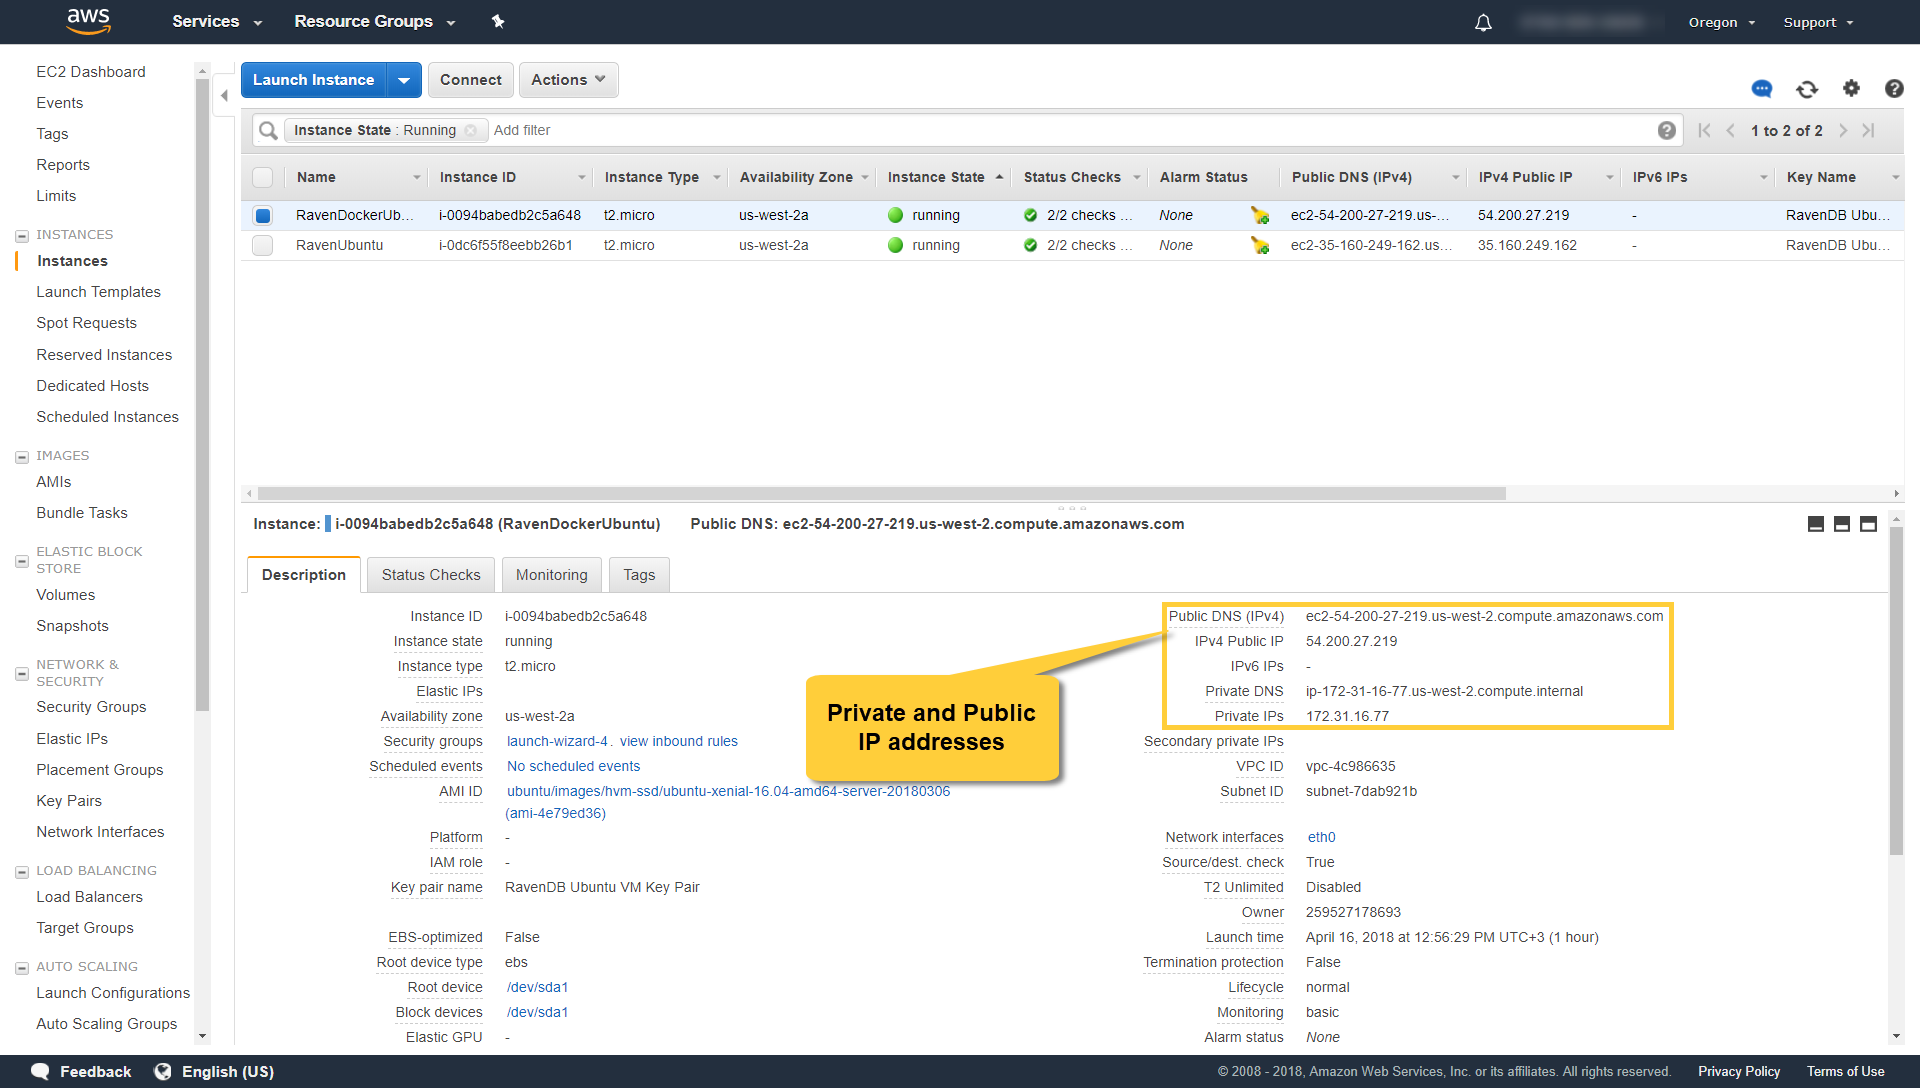
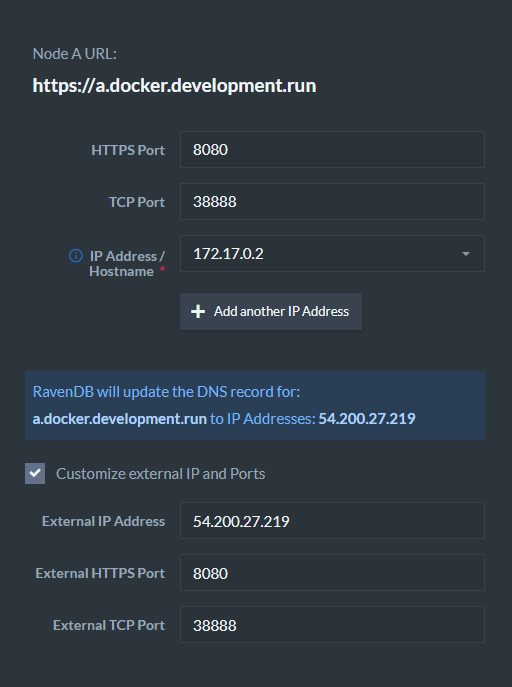
Back in the wizard, enter the private IP address RavenDB binds to (e.g. 172.17.0.2) in the "IP Address / Hostname" field.
Check the External IP box and enter the public IP address of the VM (e.g. 54.200.27.219). Make sure to enter the ports you exposed in the docker run command in the "External Port" fields (8080 and 38888 in our example).
Start the installation.
If you encounter errors during the process, please visit the FAQ section.
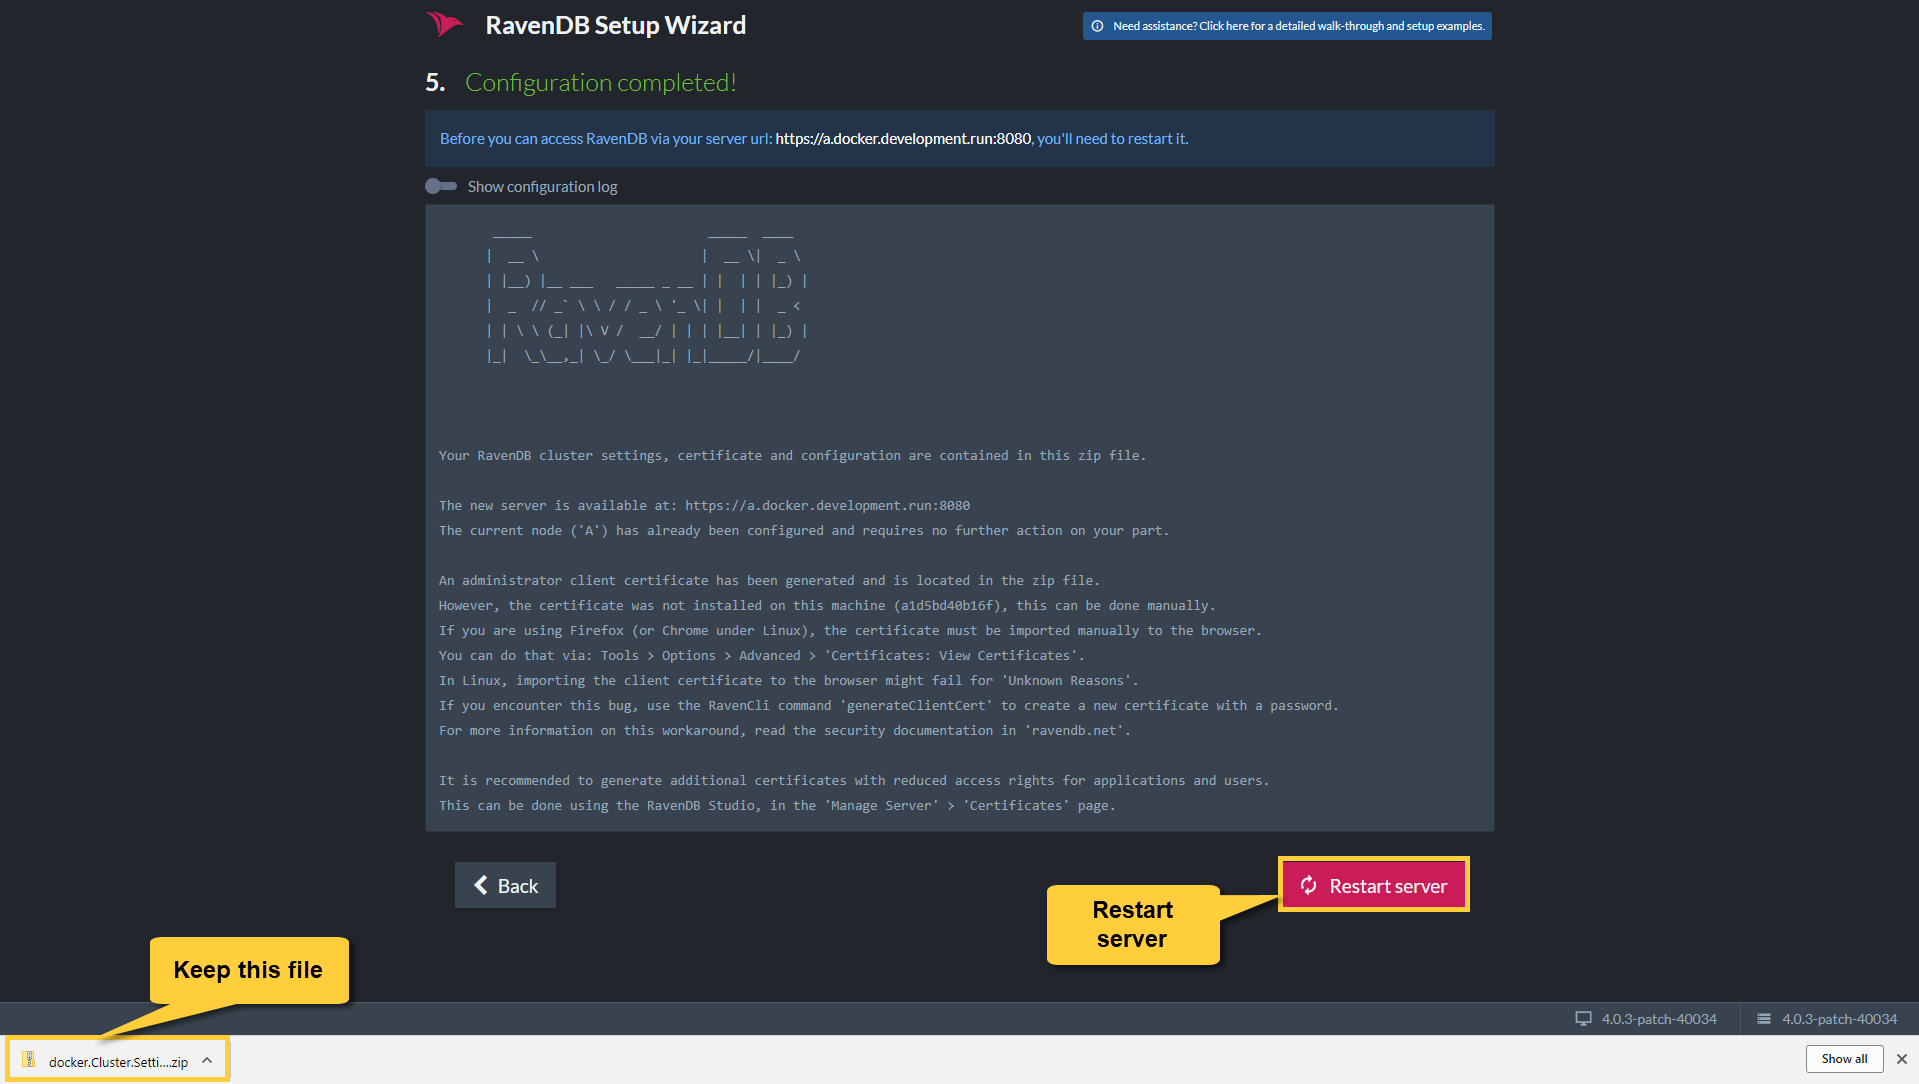
When the setup is finished, you will receive a configuration ZIP file which contains an admin client certificate which will allow you to connect using the browser. Keep the file safe.
Restart the server.
Access the Studio
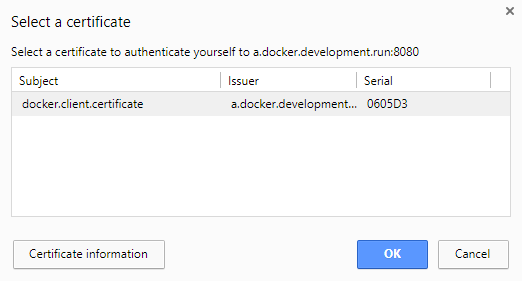
If everything went well, you should be redirected to the studio and Chrome should let you choose the client certificate to use (the one which was just created).
Some environments don't allow to set the client certificate automatically in the setup wizard so if you are not redirected to the Studio, and you get an authentication error, please close all instances of the browser and install the admin client certificate manually.
Now you can access the Studio, open the browser and enter your new domain (e.g. https://a.docker.development.run).
Chrome will let you select the certificate.
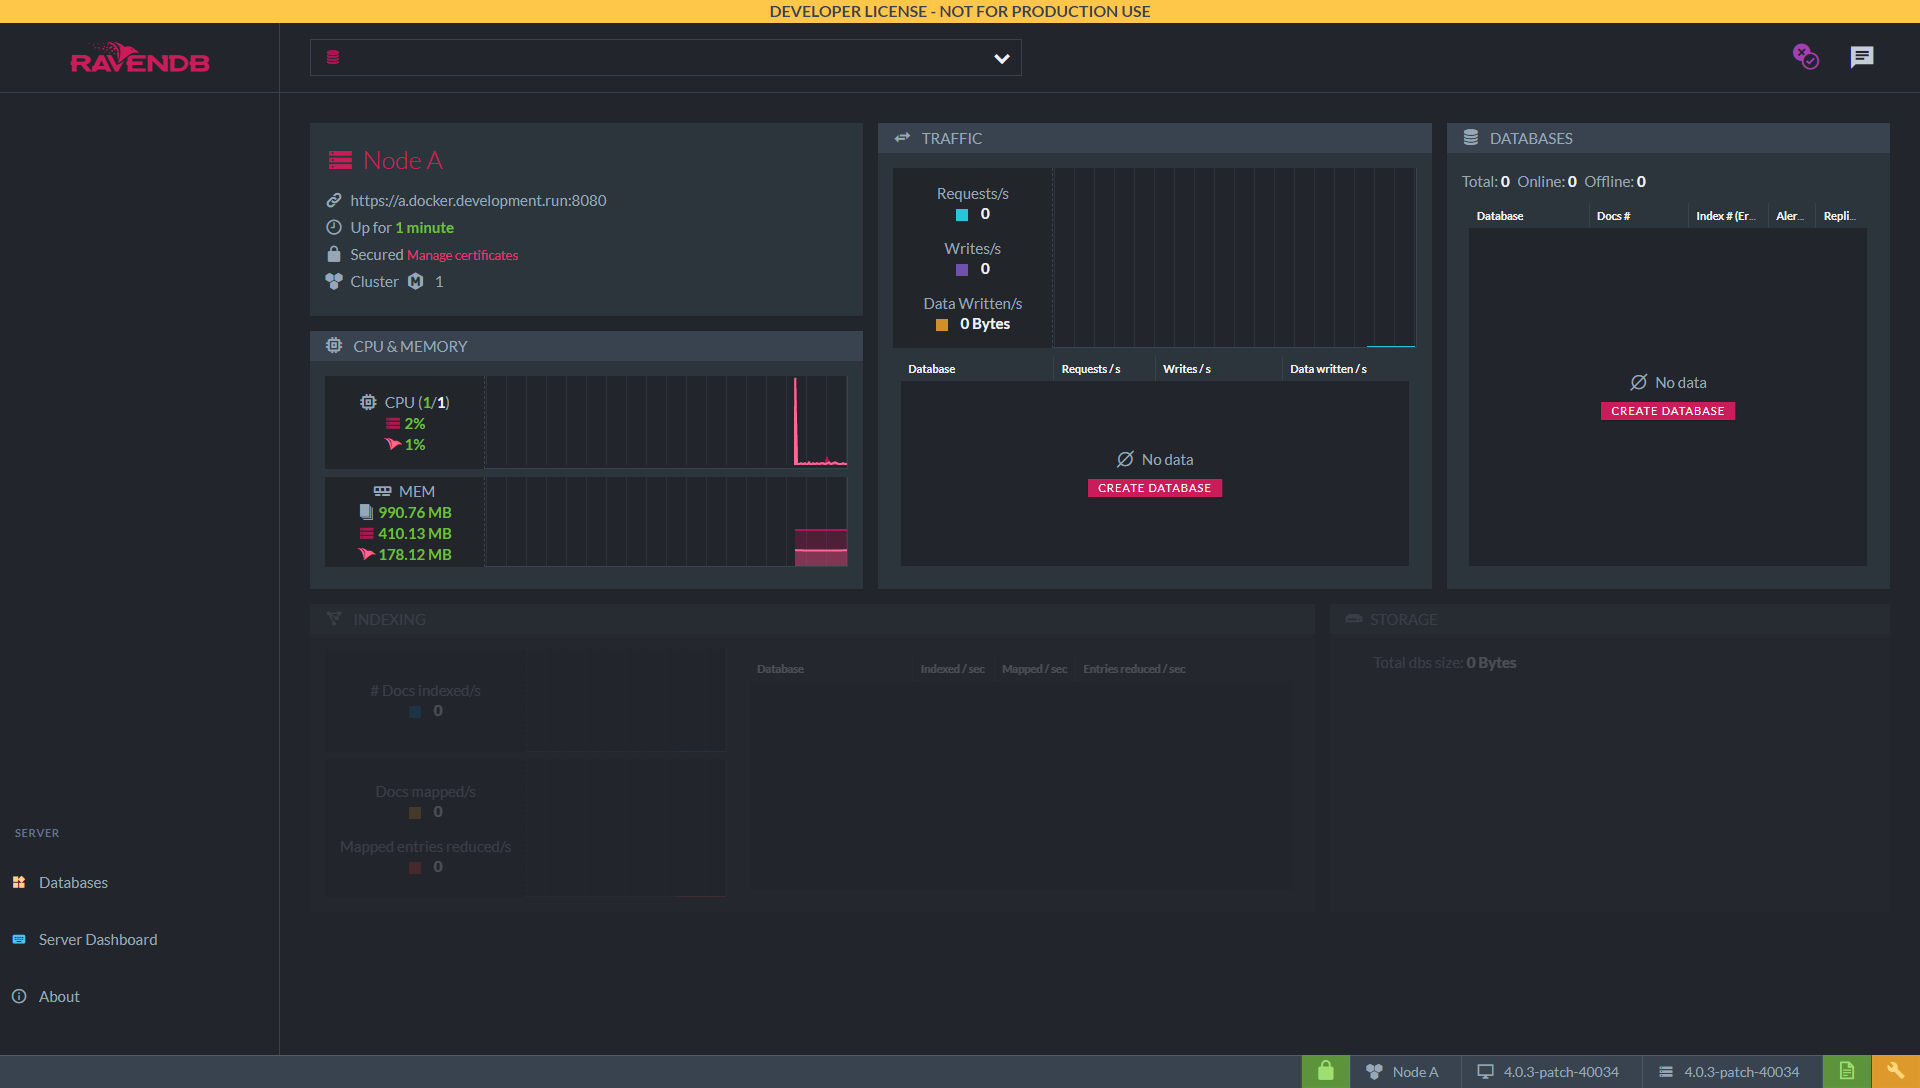
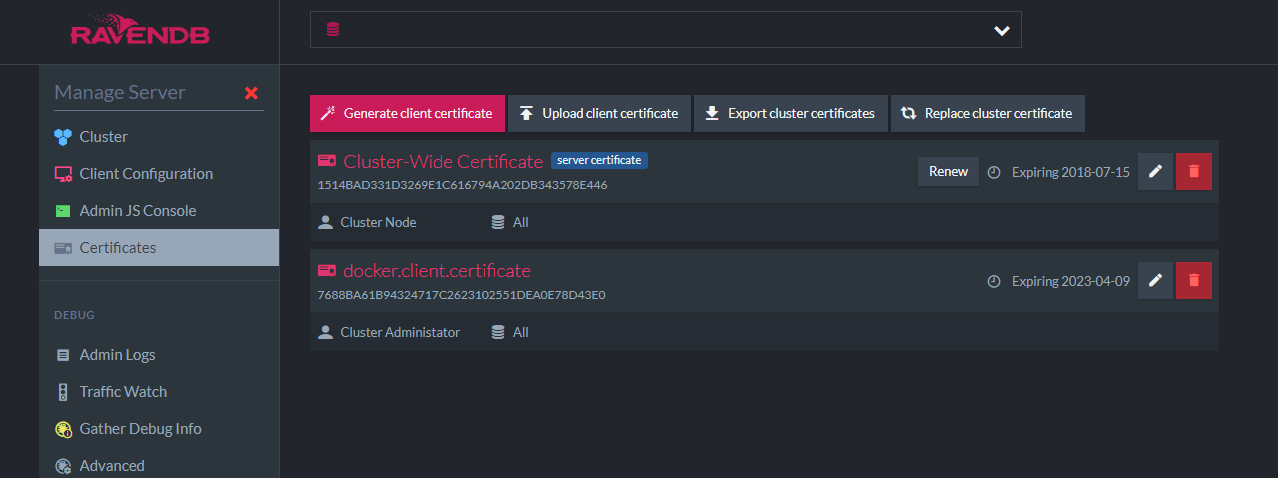
Access the certificate view to see both the loaded server certificate and the admin client certificate. Make sure to read the security section for better understanding of certificates and security issues.
Congratulations, you have a secure RavenDB server running on Docker on a simple EC2 machine. Have fun with it!
Connecting a few servers in a cluster is easy. Follow these instructions to construct a cluster during setup.