 Skip to Navigation
Installation: Kubernetes: Azure AKS
In this walkthrough, we will set up a Kubernetes RavenDB cluster in AKS. The guide assumes prior knowledge of basic Kubernetes concepts. For more information please refer to the Kubernetes official documentation.
Setting Up the Environment
Follow the Quickstart Guide, up to the point where you have installed Azure Cli and Kubectl and you have a running 3-node cluster.
In this guide, we create a 3-node Standard Cluster with the most basic default settings.
az aks create --resource-group RavenDBResourceGroup --name RavenDBCluster --node-count 3 --enable-addons monitoring --generate-ssh-keys --node-vm-size Standard_B2sWhen the cluster is ready (can take a few minutes), run the following command to authenticate with it:
az aks get-credentials --resource-group RavenDBResourceGroup --name RavenDBClusterDeploying secrets
For setting up a secured Kubernetes cluster, you must have your own domain and certificate. The RavenDB setup wizard with Let's Encrypt is not supported for this scenario.
There are a few ways you can get a certificate. One way is to purchase it from a well-known certificate authority.
Let's Encrypt is a certificate authority which provides free certificates. There are many tools available online that automate the process of getting the certificate from Let's Encrypt. Two examples are Certbot and a C# client called Certes.
RavenDB will accept PFX server certificates which contain the private key, are not expired, and have the following fields:
- KeyUsage: DigitalSignature, KeyEncipherment
- ExtendedKeyUsage: Client Authentication, Server Authentication
If you wish to use a self-signed certificate, you must register the CA certificate in the OS. A Docker image can be created based on the RavenDB image:
FROM ravendb/ravendb:latest
ADD my-ca.crt /usr/local/share/ca-certificates/my-ca.crt
RUN update-ca-certificates
In this guide, we are going to use a wildcard certificate for *.example.ravendb.cloud and a RavenDB developer license (get a license here).
You first need to convert the license and certificate files to base64. For example, in C# it can be done like this:
Convert.ToBase64String(File.ReadAllBytes("example.ravendb.cloud.pfx"))[Convert]::ToBase64String([IO.File]::ReadAllBytes("example.ravendb.cloud.pfx"))Download secrets.yaml and edit it with the base64 values of the license and certificate. Then deploy it to the cluster.
kubectl create -f .\secrets.yamlDeploying the HAProxy Ingress Controller
Kubernetes ingress is a collection of routing rules which define how external users access services running in a Kubernetes cluster. In order for the Ingress resource to work, the cluster must have an ingress controller running. There are many third-party implementations and for this example, we chose to work with HAProxy.
First, we need to label all of our cluster nodes:
kubectl label node role=ingress-controller --allThen we deploy the ingress controller with all of the necessary RBAC (Role Based Access Control) rules.
Download haproxy.yaml and deploy it to the cluster:
kubectl create -f .\haproxy.yamlYou may check that the command was executed by asking Kubectl to list all the pods and services in the default namespace.
Take a look at the External-IP field. About a minute after deploying, you will receive a public IP for your cluster.
kubectl get svc
kubectl get pod
Deploying the RavenDB StatefulSet
Download ravendb.yaml, edit the ConfigMap and Ingress objects with your personal domain information, and deploy it to the cluster:
kubectl create -f .\ravendb.yamlThis will deploy the RavenDB StatefulSet and the RavenDB pods will be created by order.
RavenDB should be deployed in a StatefulSet (and not in a Deployment or ReplicaSet) which guarantees the following:
- Stable, unique network identifiers.
- Stable, persistent storage.
- Ordered, graceful deployment and scaling.
- Ordered, automated rolling updates.
To view the status of the cluster, run the following commands:
kubectl get pod
kubectl get svc
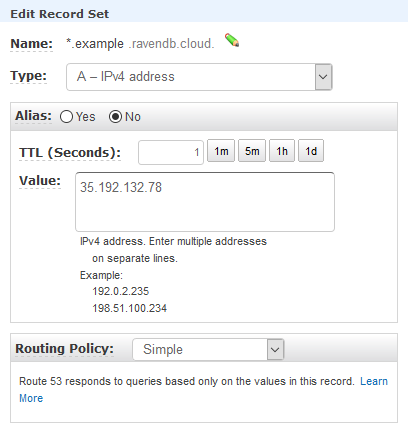
While the RavenDB pods are being created, you may already set DNS records. Go to your domain provider and create an "A Record" with the External-IP of the HAProxy service.
In our example, we create an "A Record" for *.example.ravendb.cloud and set the IP address to 35.192.132.78 and the TTL to 1 second.
Before trying to access the cluster, please register your wildcard server certificate in the OS (User Certificates Store).
This will allow Chrome to recognize it and be able to use it to authenticate to the cluster.
After the cluster is set up, you should use the RavenDB Studio to create a ClusterAdmin client certificate, and use it instead of the server certificate.
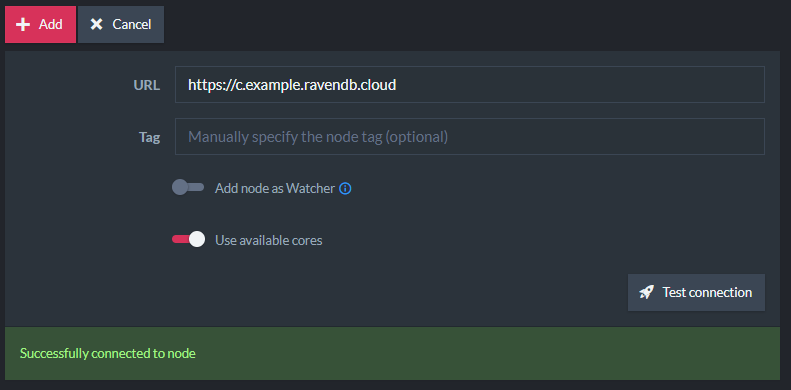
Open Chrome and go to https://a.example.ravendb.cloud, then use the Cluster View in the Studio to add the other nodes to the RavenDB cluster.
Troubleshooting
If pods or services are not running or if they have errors you can issue a few commands that will help debug the problem.
The logs command displays the standard error of the pod. In case RavenDB threw a startup exception, it will be shown there.
kubectl logs ravendb-0Running the describe command on any Kubernetes object (sts, svc, ingress, pod) will show details about the deployment of that object and in some cases relevant errors will be written there.
kubectl describe pod haproxy-ingress-5d4d8d95d8-5rtqhIf you need to restart a pod, simply delete it and it will terminate and then come back.
kubectl delete pod ravendb-2If you delete the entire StatefulSet, the pods will be terminated by order of creation.
kubectl delete sts ravendb