Import Data from a Live RavenDB Server
-
In addition to importing data from a .ravendbdump file, data can also be imported directly from an existing database on a live RavenDB server.
-
Backward compatibility is supported.
You can import a database from a previous RavenDB version into your current server. -
The process consists of the following steps:
1st Step: Prepare Servers for the Import Process
2nd Step: Access the Import View
3rd Step: Set the Source Server URL and database
4th Step: Set Import Options
5th Step: Advanced Import Options
1st Step: Prepare Servers for the Import Process
-
Before migrating data from a secure source server, the destination server must also be secure.
You must pass the certificate from the destination to the source server. The following steps explain how. -
Perform this step only if your source RavenDB server is a secure verion 4.x (or newer) server that is running on HTTPS. For other servers, skip this step and continue to Step 2.
-
To import, the destination server needs to access the existing source database and fetch data from it.
To grant such access, you must first register the destination server certificate as a client certificate on your source server. -
To accomplish this, follow these steps:
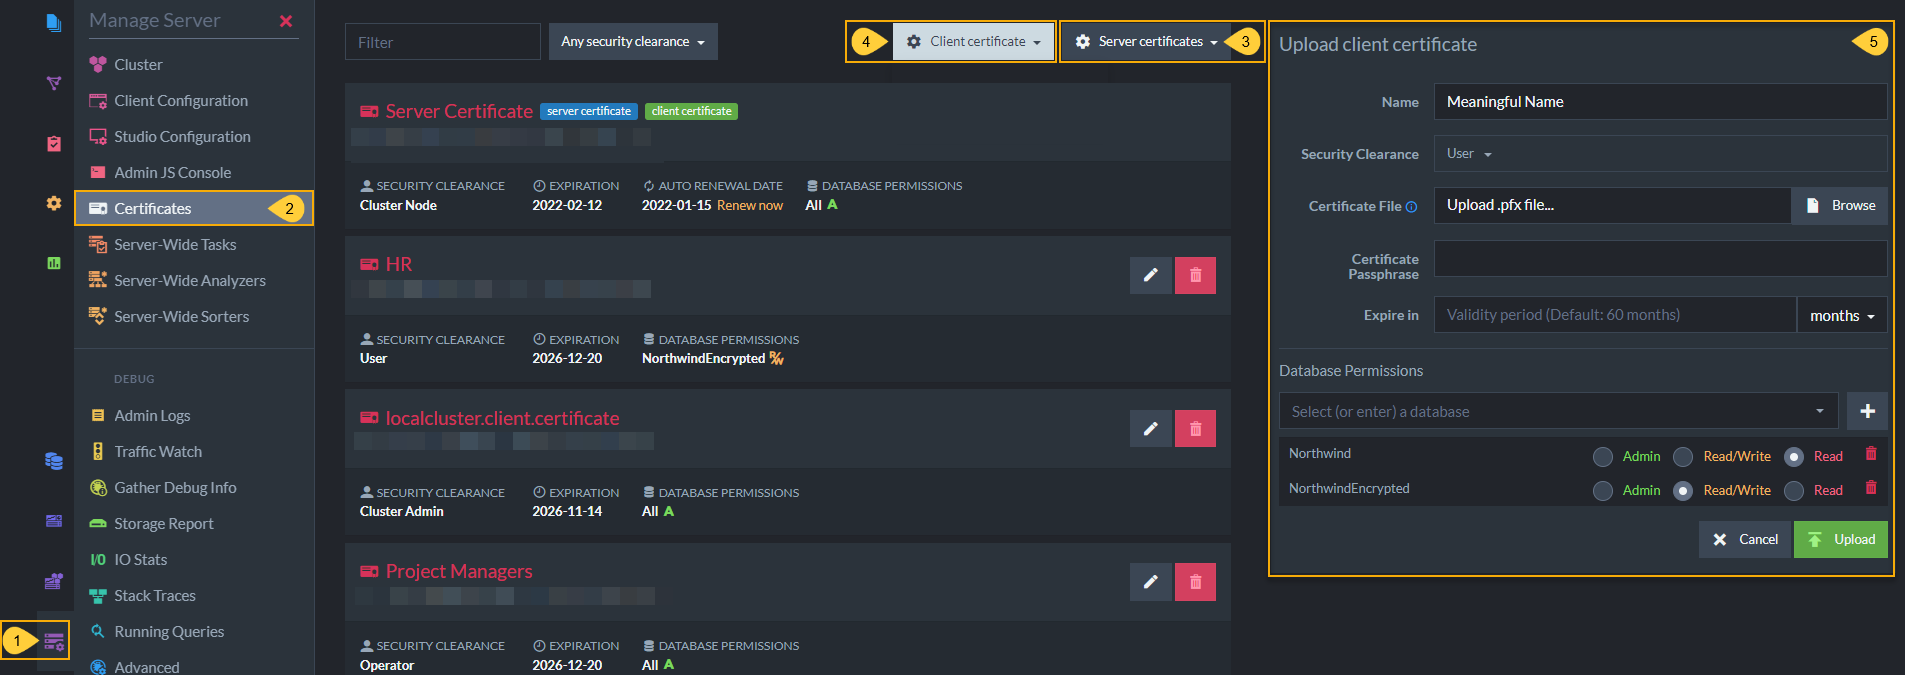
Studio Manage Server-Certificates View
-
Manage Server
Click the Manage Server tab. -
Certificates.
Select Certificates. (See Certificates Management) for more information on this Studio view. -
Server certificates
Export the destination RavenDB certificate from the DESTINATION RavenDB server.

- Choose Export Server Certificates option from the Server Certificates dropdown.
-
Client certificate
Register this certificate on the SOURCE RavenDB server
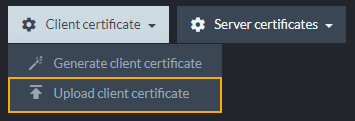
- Choose Upload client certificate to upload the exported certificate as the client certificate.
-
Upload client certificate
Set the certificate details.
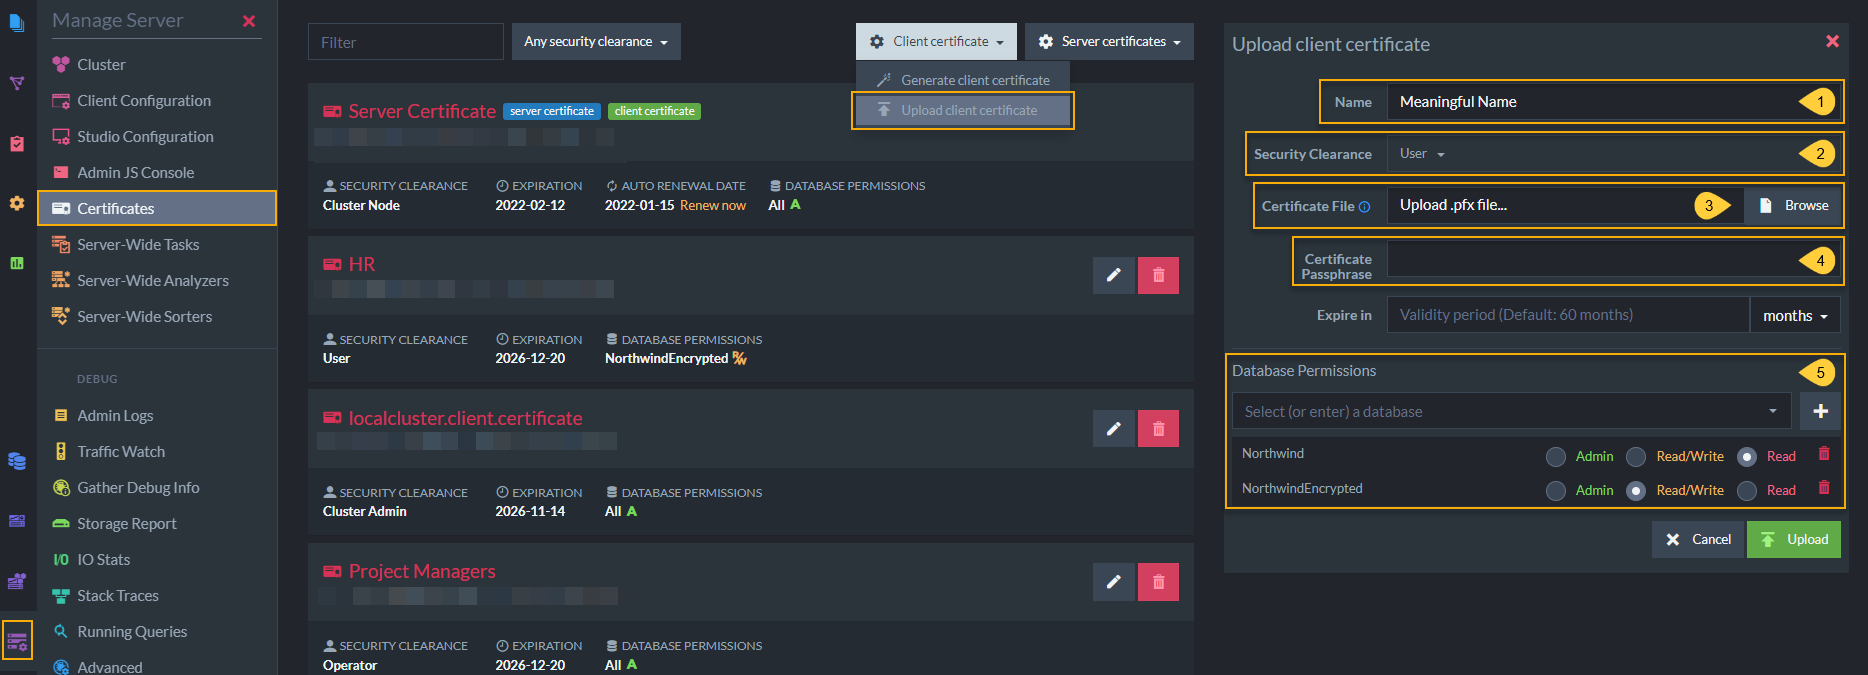
- Name
Enter a name for this certificate. For future clarity, consider naming each certificate after the role that it will enable in your system (Full Stack Development, HR, Customer, Unregistered Guest, etc...) - Security Clearance
Set authorization level for this certificate. Read about Security Clearance to choose appropriate level. - Certificate file
Upload the.pfxcertificate file from the destination server installation folder. - Certificate Passphrase
(Optional) Set a password for this certificate. - Database permissions
Select databases and permission levels for this certificate.
If you choose User security clearance, you can give access to specific databases on the server and configure User authorization levels for this certificate.
Click Upload to complete the process.
The uploaded certificate will be added to the list of registered client certificates on this server. - Name
2nd Step: Access the Import View

Databases List View
On the destination RavenDB server, select a database into which the data will be imported.
- Verify that this database is empty as the import will overwrite any existing content.
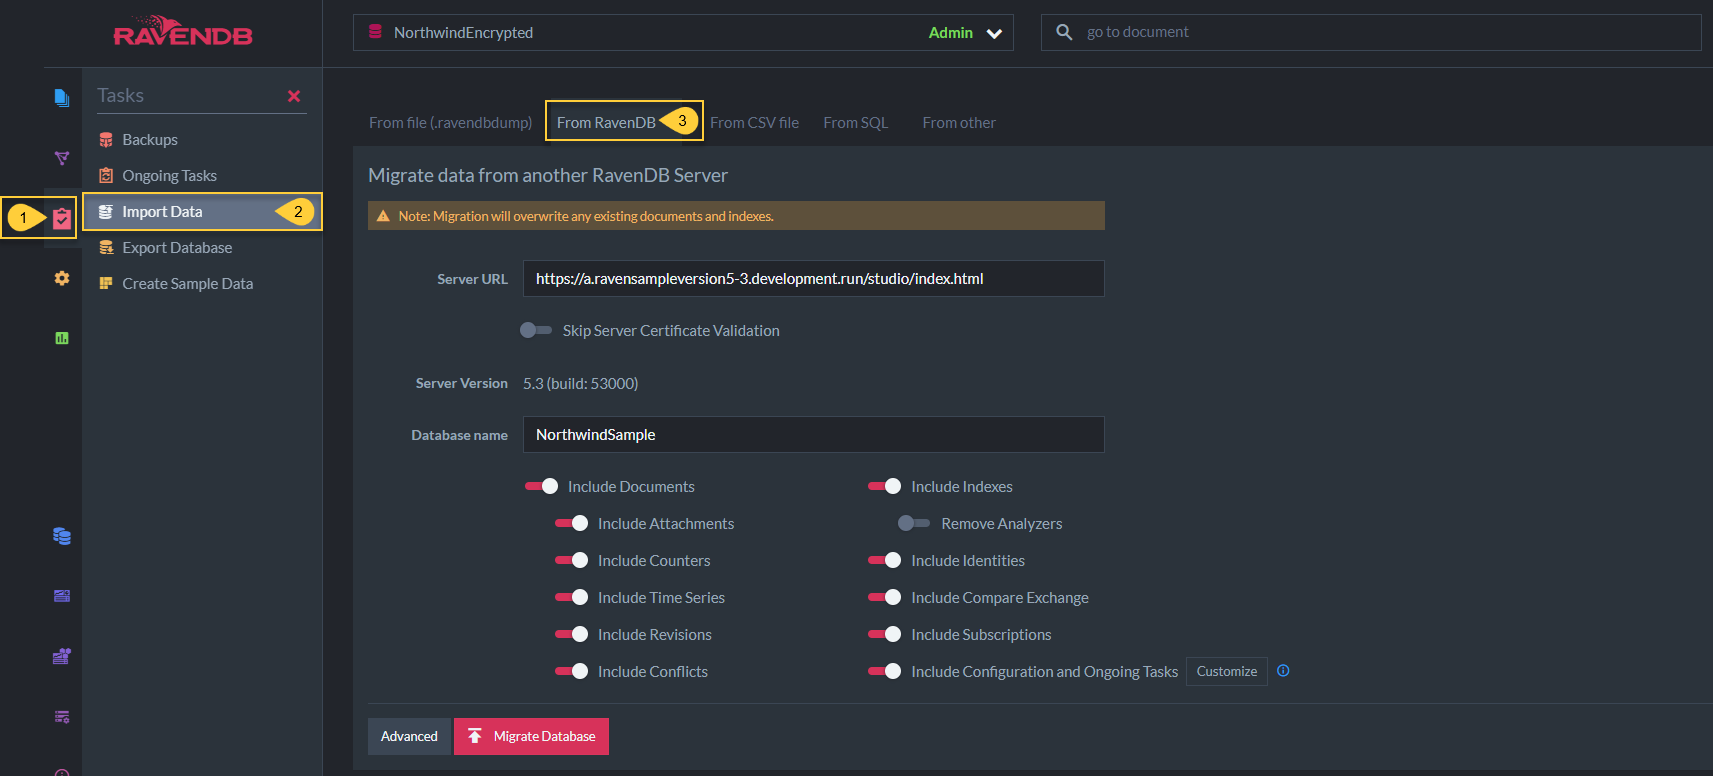
Go to Import Data View
- Click Tasks tab.
- Select Import Data.
- Select From RavenDB.
3rd Step: Set the Source Server URL and database
- Specify the source server URL and select the database to import the data from.
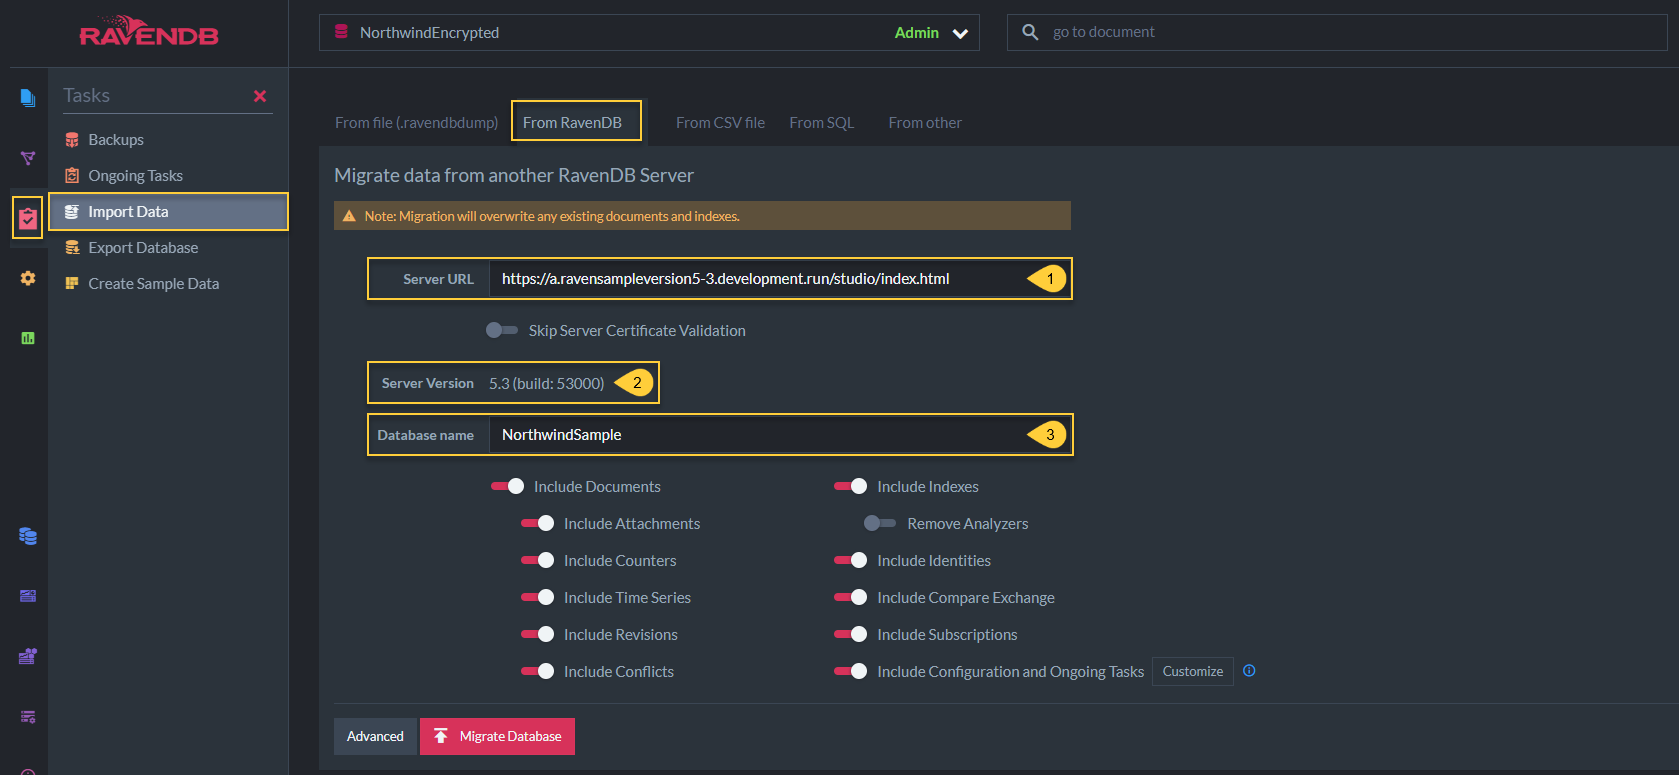
Import Configuration
- Server URL
Paste URL of the server you want to import from. - Server Version
The version of the server that you want to import from will show here once you enter the URL. - Database Name
Enter the name of the database that you want to migrate your data from.
4th Step: Set Import Options
- Filter the data you want to import.
- Customize advanced configuration and apply a transform script under the Advanced Import Options.
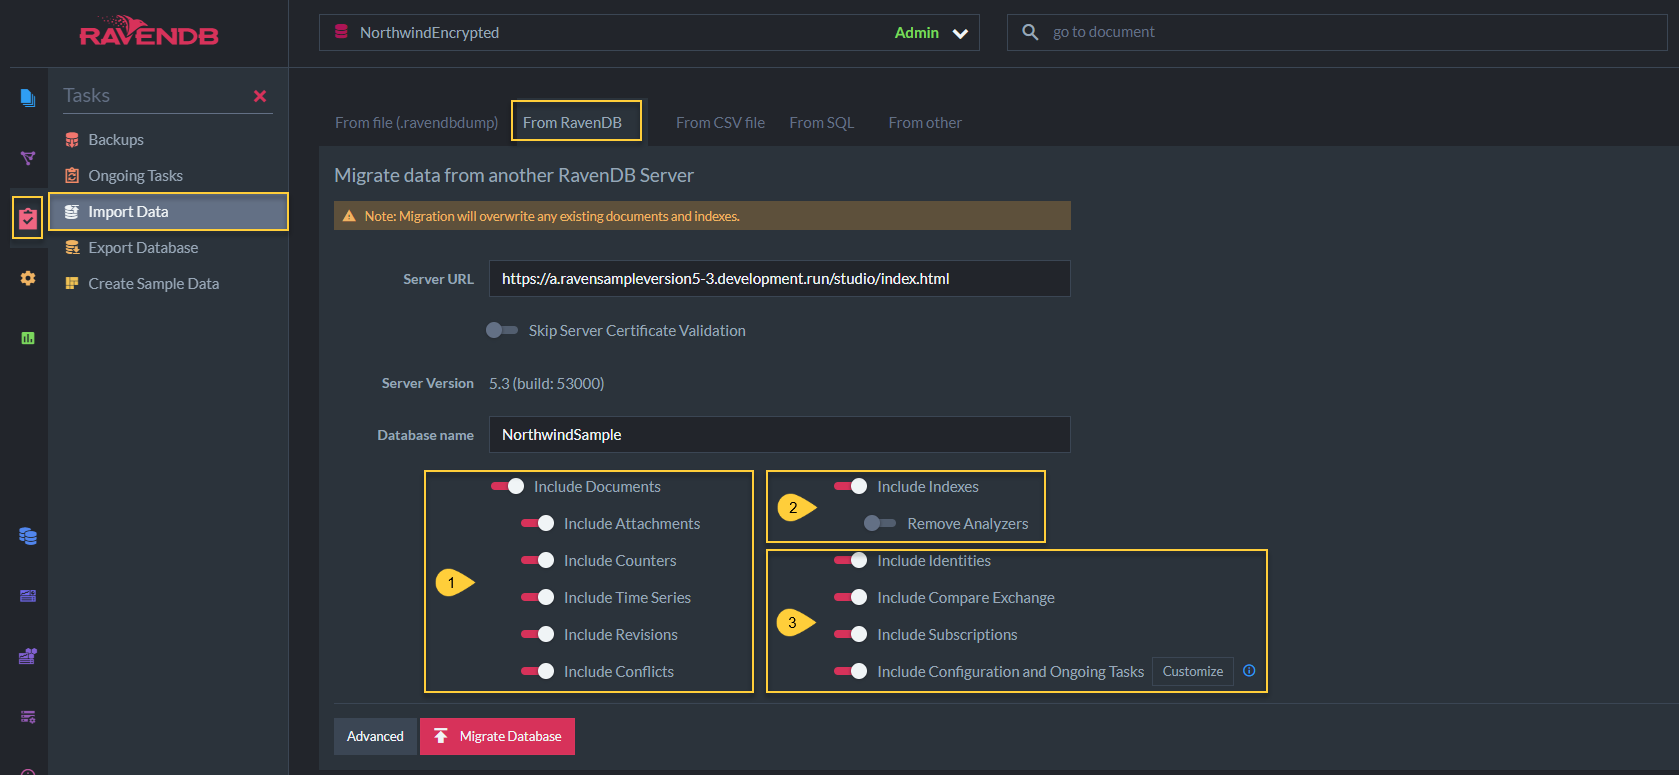
Import Options
Toggling Import Options determines whether the following items will be imported:
-
Documents
- Include Documents
Toggle to include documents and to enable inclusion of the following document related items: - Include Attachments
- Include Counters
- Include Time Series
- Include Revisions
- Include Conflicts
- Include Documents
- Indexes
- Other
Importing an item that doesn't exist
If any of the options is set but the source database doesn't contain any items of that type, the type will be skipped.
5th Step: Advanced Import Options
Click the Advanced button at the bottom of the options view for the following import features.
Transform Script
In the Studio, select database > click Task tab > select Import > select From RavenDB > click the Advanced button at the bottom > toggle Use Transform script.
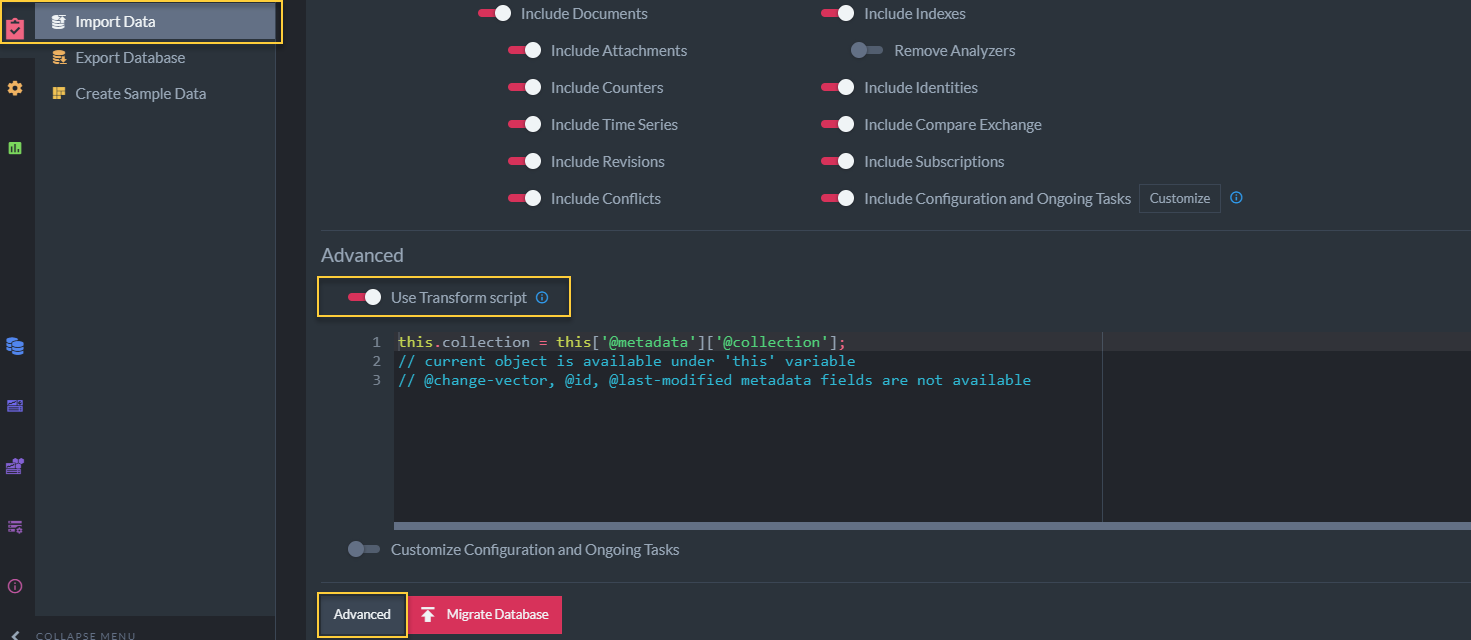
Advanced Import Options - Transform Script
- Use Transform Script:
When enabled, the supplied javascript will be executed on each document before importing the document.
Sample transform javascripts:
// Example 1
delete this['@metadata']['@change-vector']
// The script above will delete the existing change-vector from imported documents,
// New change vectors will be generated during the import.
// This is very helpful if the data is imported from a different database-group
// and you want to avoid adding old change-vector entries to a new environment.

// Example 2
this.collection = this['@metadata']['@collection'];
// This script will create a new 'collection' property in each imported document.
Customize Configuration and Ongoing Tasks
In the Studio, select database > click Task tab > select Import > select From RavenDB > click the Advanced button at the bottom > toggle Customize Configuration and Ongoing Tasks.
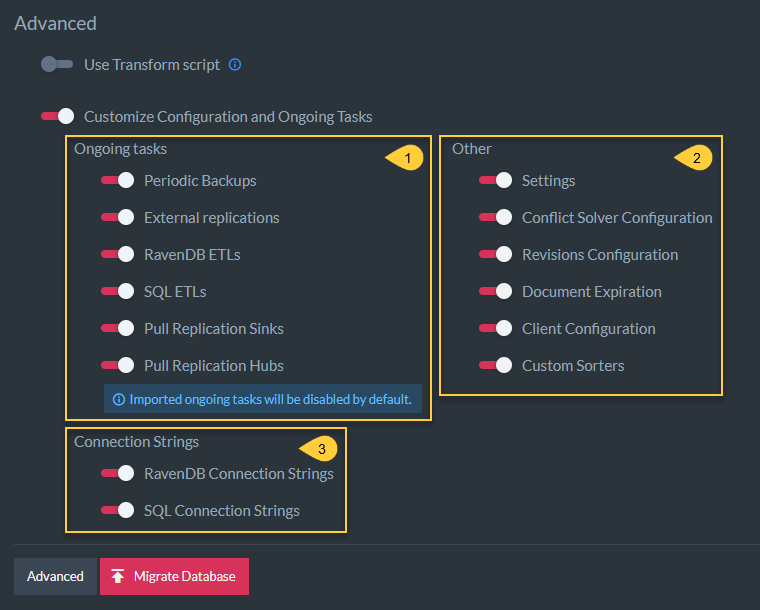
Advanced Import Options - Customize Configuration and Ongoing Tasks
-
Ongoing tasks:
-
Other:
-
Connection Strings:
- Connection Strings used by ETL tasks to authenticate and connect to external databases will be imported.