Cloud: Migration
Databases can be migrated between any two instances of RavenDB, including migration between on-premises and cloud servers and between different RavenDB versions.
Import From Live RavenDB Instance
You can easily migrate your database using the import data from RavenDB operation.
In order to do so, the source server needs to have the destination server's cluster certificate.
Open the Management Studio of each server.
Each server's Studio is available in the Portal's
Product tab.
Learn how to install the certificate and access RavenDB Cloud Studio if this is your first time using Cloud Studio.
If you have already installed the certificate and accessed Studio, click the URLs in the Products tab to open a Studio GUI for each node.

Server URLs
In each studio, select server dashboard and click Manage certificates.
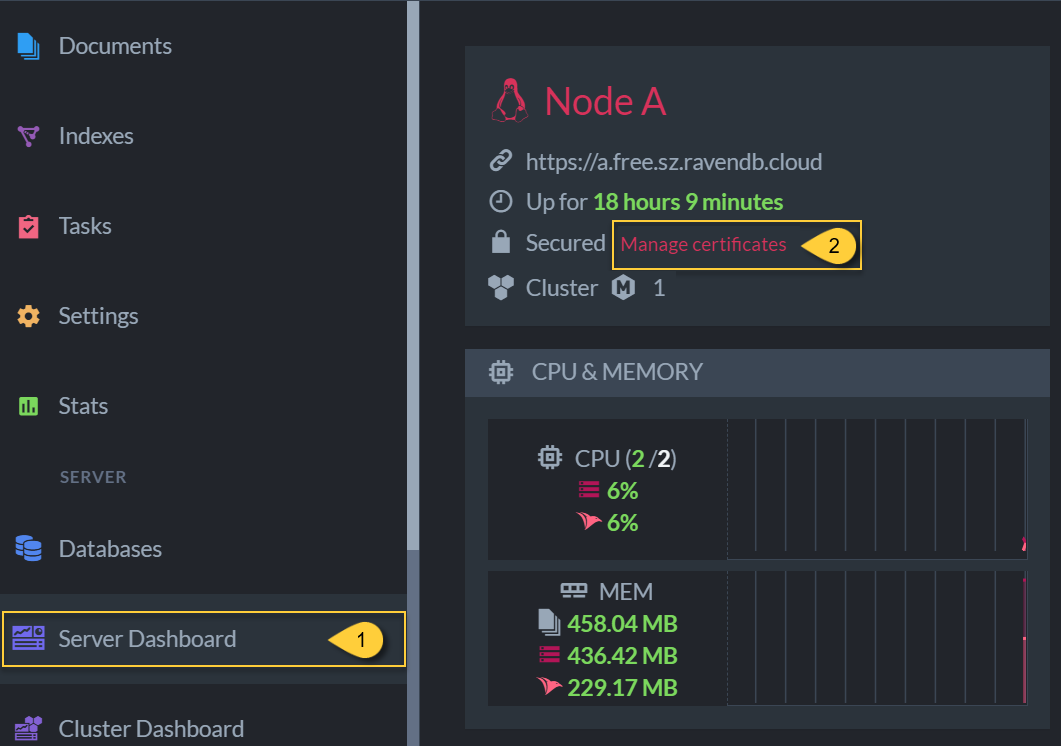
Manage Certificates
Export the destination server's Cluster certificate.

Cluster Certificate
Import the certificate as a Client Certificate by the source server.
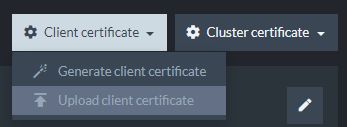
Client Certificate
Configure the Client Certificate's Database Permissions to include the database whose data you want to migrate.
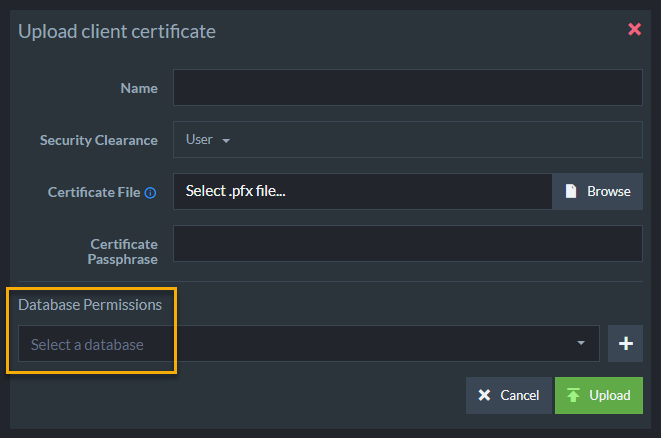
Database Permissions
In the Destination Server, create or select an empty database and open its Tasks --> Import Data option.
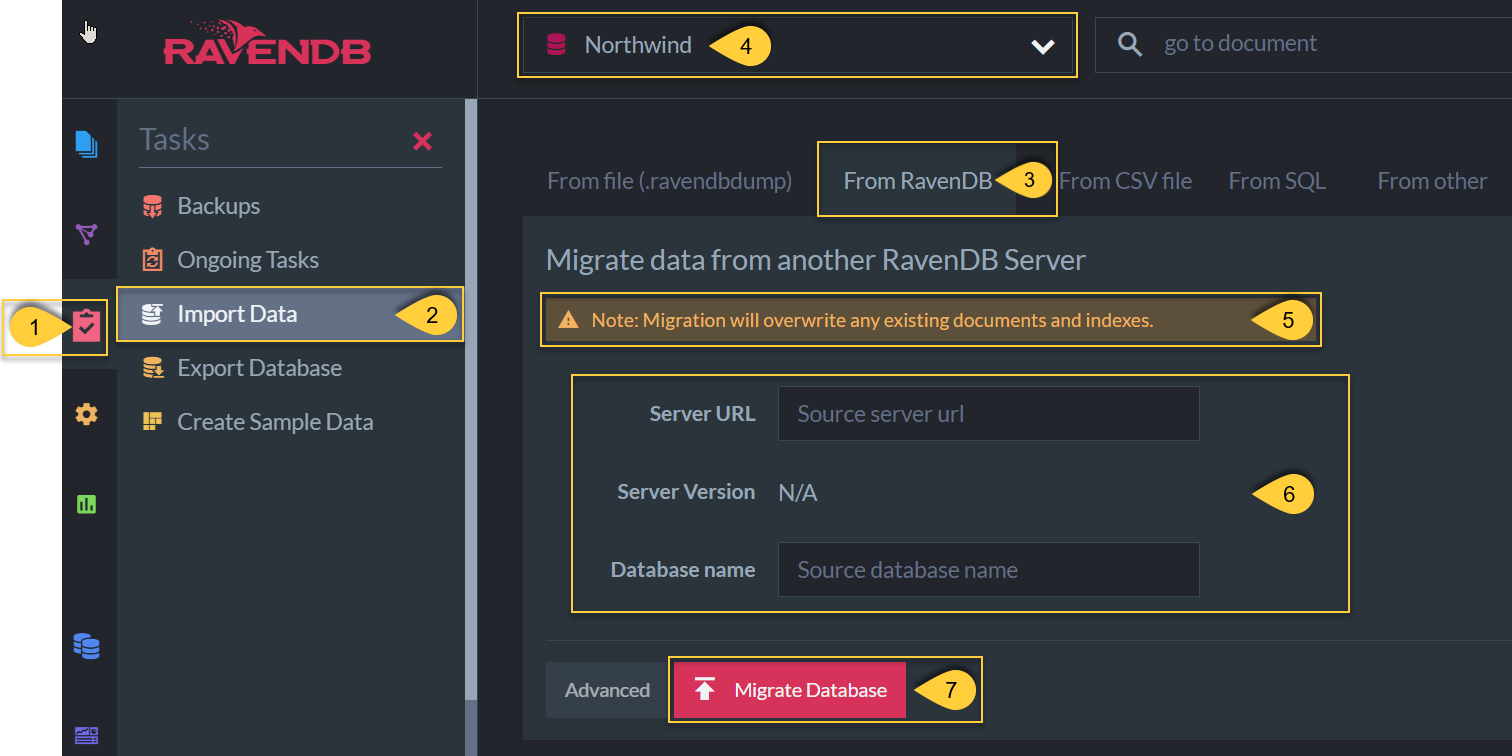
import data
- Select the Tasks tab.
- Select Import Data.
- Select the From RavenDB tab.
- Select the destination server.
- Make sure that you are not writing over data that you want to keep. One option is to start a new database with the studio. If you create a new one, choose the new database server in step 4 (above).
- Enter the URL of the source server and choose which data to migrate.
- Click Migrate Database
Import From File
Another option is to export a database from the source server in the
.ravenDBDump format, and upload it to another database using the
import data from file operation.
This option doesn't require passing certificates:
First export the data from source server
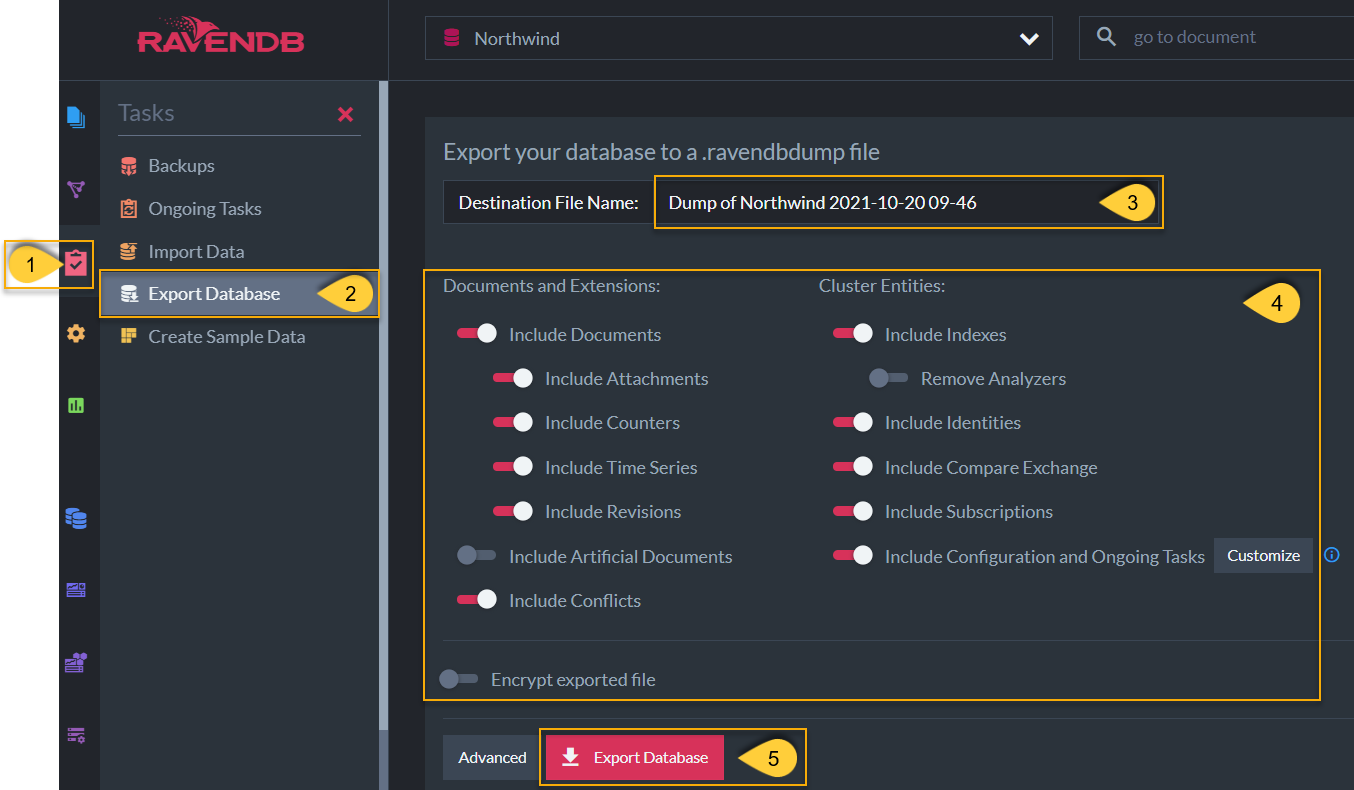
Export Data to File
- In the source server, select a database to export and go to Tasks tab.
- Select Export Database.
- Change the destination file name if you'd prefer (optional).
- Select desired options.
Note that Encrypt Exported File is off by default. - After choosing which data to export, click Export Database.
Next import the data to destination server from file
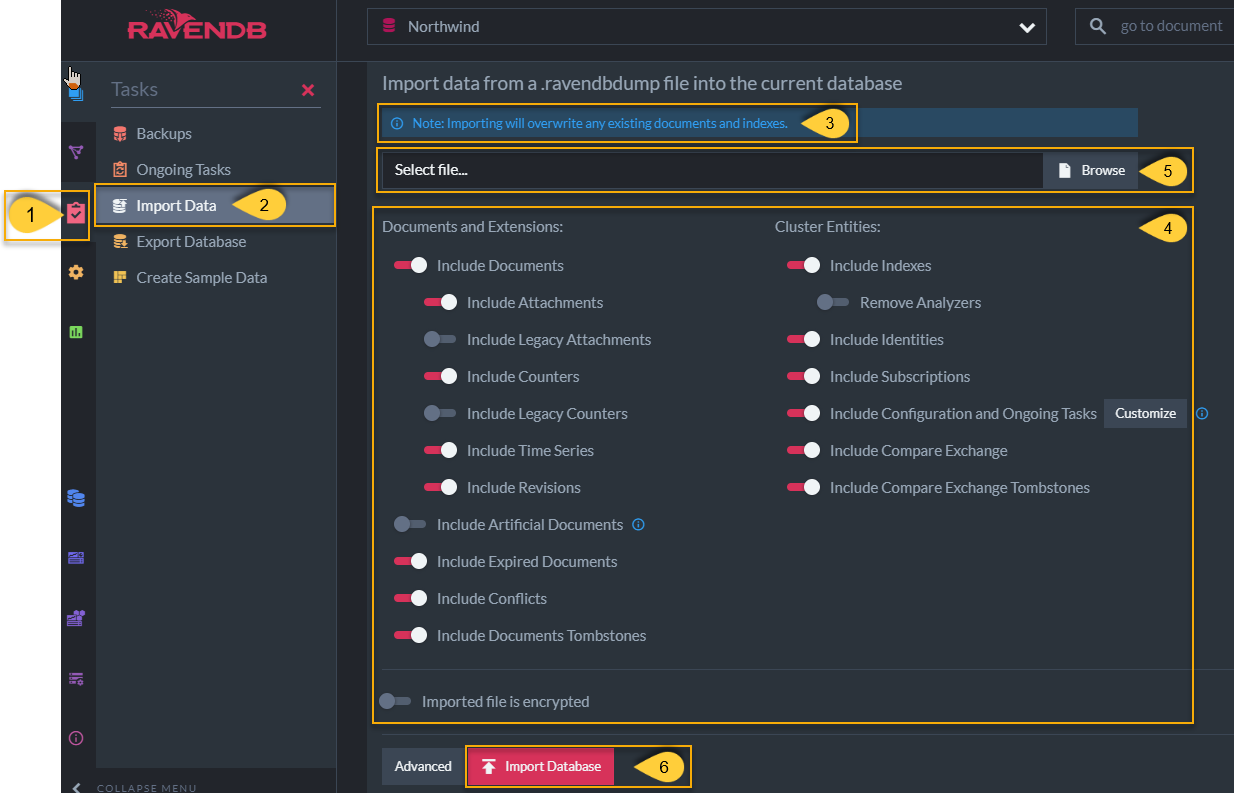
Import Data from File
- In the destination server, go to Tasks tab.
- Select Import Data.
- Make sure that you are not writing over data that you want to keep.
One option is to start a new database with the studio. - Select the
.ravendbdumpfile that you previously exported from the source server. - Select desired options.
If you encrypted while exporting make sure to select imported file is encrypted. - Click Import Database.
Documents Recently Deleted from Source Database
- If you've deleted documents from the source database in the last few minutes before live-importing, the deleted documents will still appear in the destination database. This is because after deleting a document, a tombstone is left behind as a signal for backups and various behind-the-scene processes.
- Once all of these processes have been completed, the tombstones are cleaned. They are cleaned every 5 minutes by default. You can configure the tombstone cleaner time intervals.
- After they are cleaned, performing another live-import will show that the documents have been deleted.