Studio: Query View
- Use the Query View to run RQL queries and view their results.
- Queries can be executed either on a Collection or on an existing Static-Index.
- RavenDB always uses an index to fetch the query results.
When a query is executed over a Collection (without any filtering condition),
RavenDB uses an internal index that is kept in its internal storage. - A query on a collection with some filtering condition will create an Auto-Index (Dynamic Query).
See Index Types for details. -
Query results can be saved/exported to a CSV file.
-
In this page:
Query View
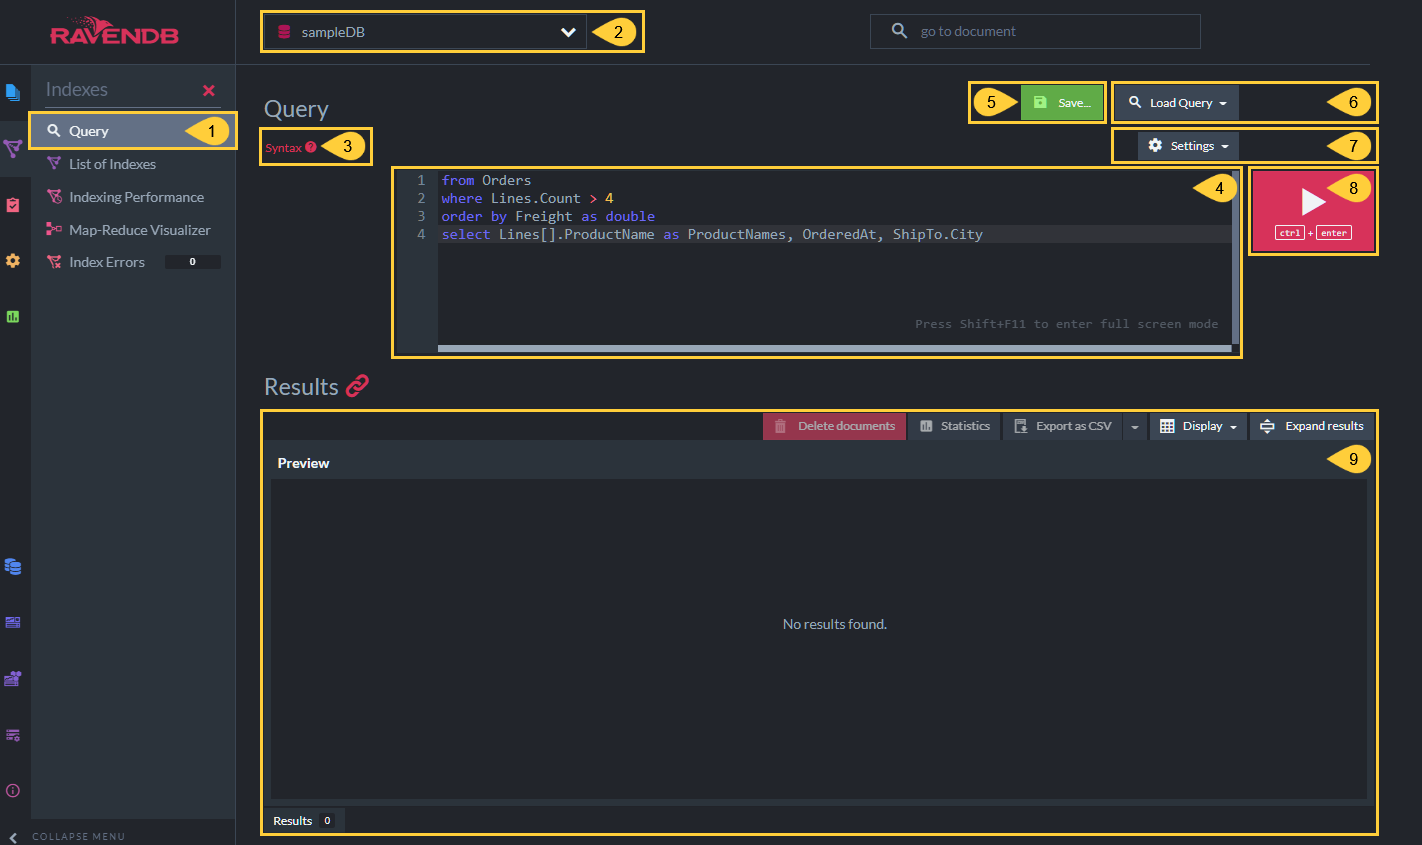
Query View
- Query View
Click to open the query view. - Database
Click to select the database you want to query. - Syntax Samples
Click to display RQL syntax samples. - Query Box
Enter your RQL query in the query box. - Save Query
Click to save the currently displayed query in the local browser storage.

Enter a name, and click the Save button again to save the query. - Load Query
Click to load a stored query.
Recent (unsaved) queries will also be listed here.
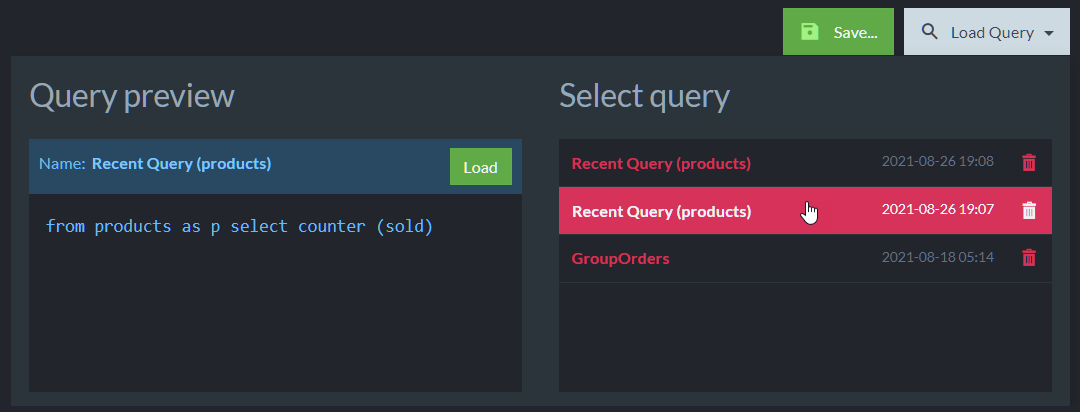
Hover over a query name to display its preview.
Click the query name or the preview Load button to load the query. -
Query Settings
Click to set query settings.
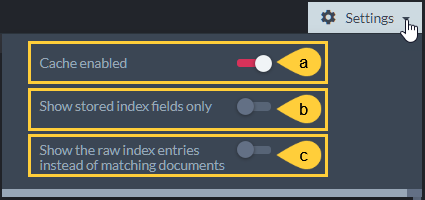
- a. Toggle to enable or disable caching of query results.
- b. Toggle to show the query results or only the stored index fields.
(Relevant only when querying an index) - c. Toggle to display raw index entries or matching documents in the query results.
(Relevant only when querying an index)
- Run Query
Click to run the query. - Query Results
The results area displays selected columns of results retrieved by your query (see below).
Query Results
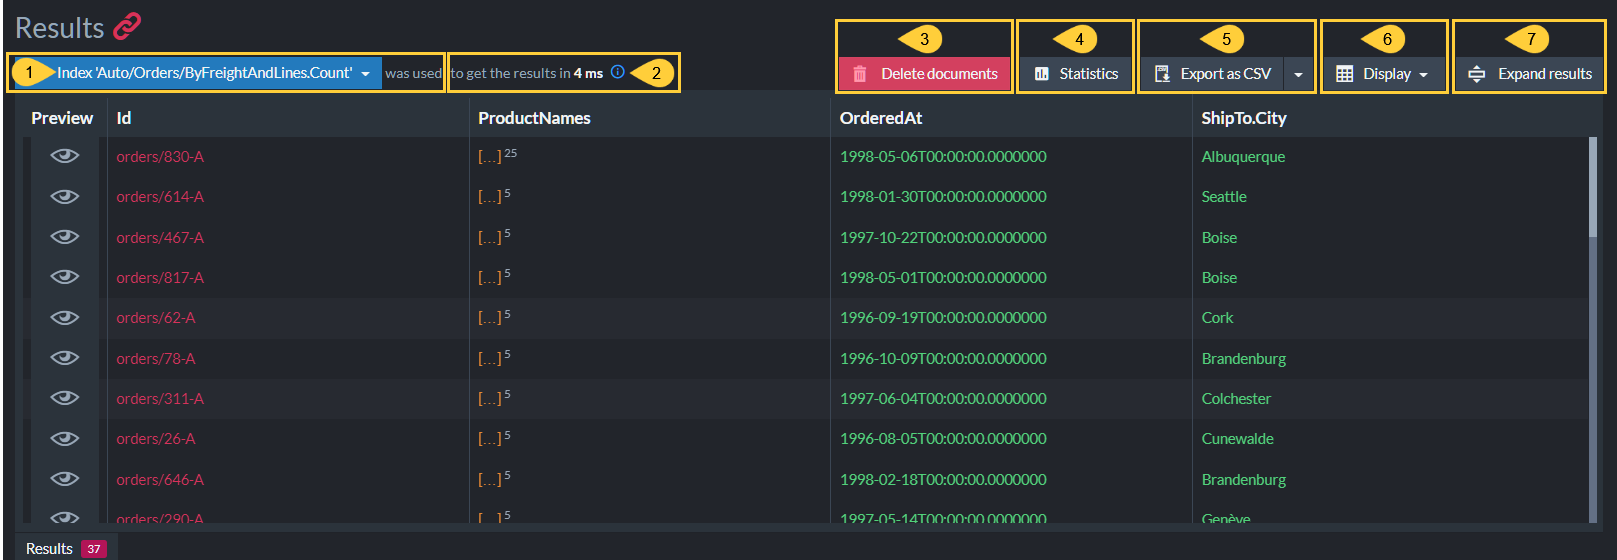
Query Results
- Index or Collection Used
The index or the collection that was used by the query. - Results Retrieval Time
The time it took to retrieve the results.
Add
include timings()to your RQL to display additional timing details in the results.
Learn more in Include Query Timings. - Delete Documents
Click to delete all documents that match the query. -
Statistics
Click to view query statistics, including -- Number of results
- Results status
- Query duration
- The index used by this query.
Either the index that was explicitly used by the query, or the internal RavenDB index that is used for collection queries. - An ETag representing the current state of the index used by the query.
(The ETag value changes with every change made to the documents)
-
Export Results as CSV File
- Click to store all query results columns in a CSV file.

- Click the drop-down and select "Export visible columns only"
to store only the columns that are currently displayed.

- Click to store all query results columns in a CSV file.
- Display
Click to open the Display drop-down dialog, where you can select which columns to display and add custom columns. (See Select Visible Columns below). - Toggle Expanded/Collapsed View
Click to expand or collapse the results view.
Select Visible Columns
To modify the displayed result columns, open the Display drop-down dialog from the Query Results view.
Custom result columns can be added, edited and removed.
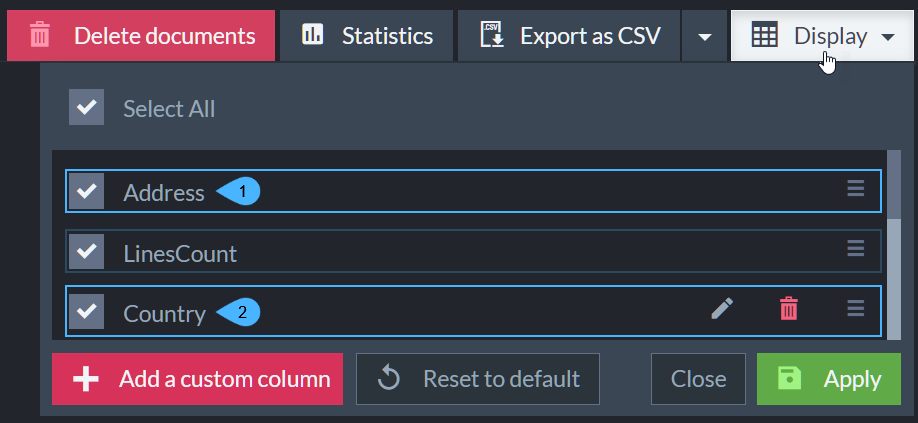
Display Dialog
- A query results column
- A custom results column
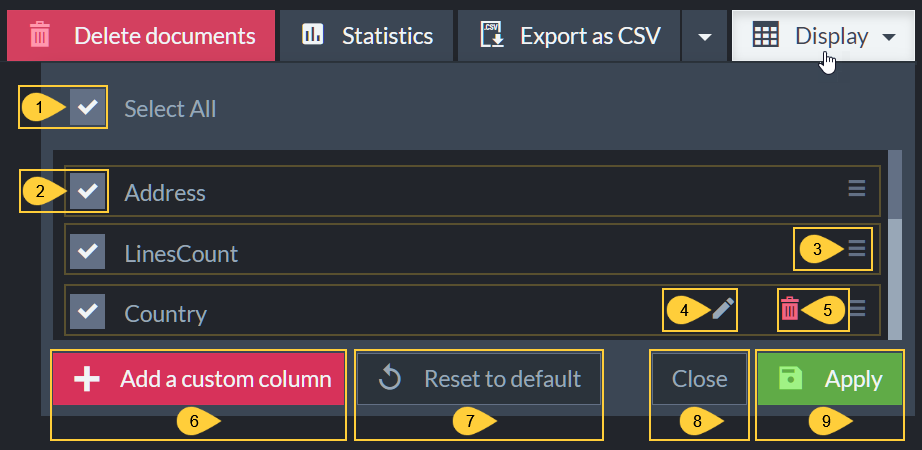
Display Dialog - Actions
Changes made in the Display dialog will take effect only when the Apply button is clicked.
- Display/Hide all columns
Check or uncheck to display or hide all columns. - Display/Hide column
Check or uncheck to display or hide this column. - Relocate Column
Click and drag to relocate the column. - Edit Custom Column
Click to edit the custom column's field and alias (see Add Custom Column below). - Remove Custom Column
Click to remove the custom column. -
Add Custom Column

- a. Identify a results field that will be displayed in the custom column.
E.g.this.Address.Country - b. Give the custom column an alias that will be displayed as the column's title.
E.g.Country - c. Click to add the new column and close the custom column dialog.
- d. Click to close the custom column dialog without adding the new column.
- a. Identify a results field that will be displayed in the custom column.
- Reset to default
Reset result columns to their original state (determined by the query). - Close
Close the Display dialog without applying your changes. - Apply
Apply your changes and close the Display dialog.
Result Columns

Result Columns
- Preview
Click for a preview of the retrieved item. -
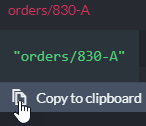
Document ID
Click the ID to open this document in the Document View,
-or-
Hover over the ID to display it in text format and optionally copy it to the clipboard.
-
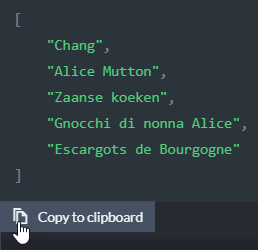
Multiple Records Result
Hover over the brackets to display the retrieved records and optionally copy them to the clipboard.
-
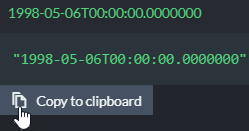
Text Result
Hover over the text to display and optionally copy it to the clipboard.
Additional Query Options
Some RavenDB features enhance the queries options.
- Time Series Query results provide insight
into your time-series data, including a graph view over time.
Learn more about it here. - Spatial Query results include a Spatial Map Tab that displays geographical locations on the world map.
- Graph Query also present query results graphically in an additional tab.
- Counter Query can be used to get counters data.