Hub/Sink Replication: Hub Task
-
A Replication Hub is an ongoing task, designed to replicate documents to and/or from Sink tasks to maintain a live replica of a database or chosen documents of it.
- The Sink is always the one to initiate the connection with the Hub, but data can be replicated in either or both directions.
- Hub/Sink connections are secure, and require certification.
-
While defining a Hub task using the Studio, you can -
- Issue certificates that would be imported later on by Sink tasks that wish to access it
- Choose replication direction/s (
Hub->Sink/Hub<-Sink/Hub<->Sink) - Use Filtered Replication to choose which documents are to be replicated
-
In this page:
Create an Ongoing Replication Hub Task

Create Database Task
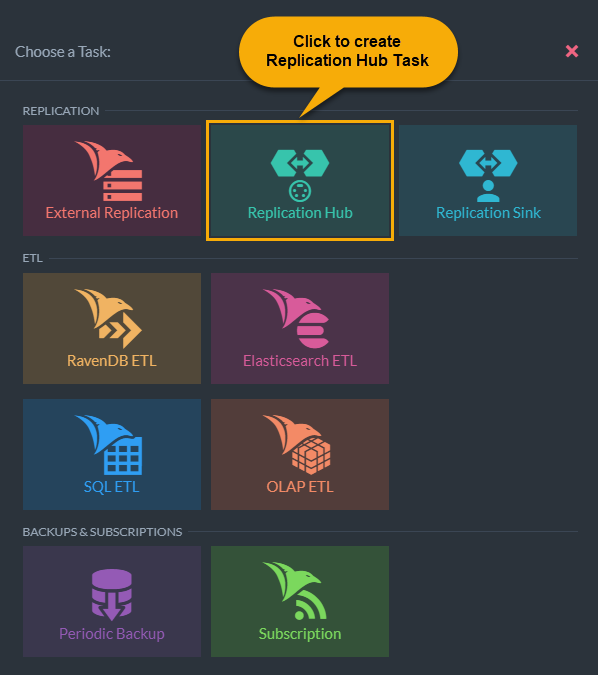
Create a Replication Hub Task
Hub Configuration
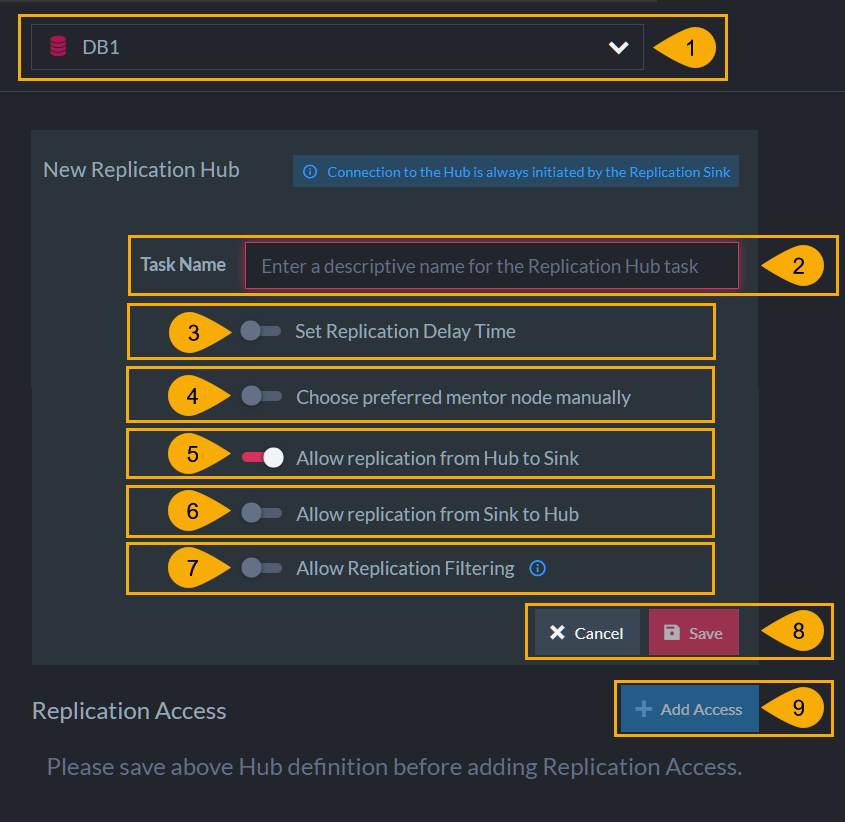
New Replication Hub
-
Choose Database
Choose the database that the task would replicate data for,
from a list of databases whose database-group includes this node. -
Task Name
Name the Hub task. -
Set Replication Delay Time
Set a delay time to initiate replication only after this period has passed after each data change. -
Choose preferred mentor node manually
Choose which node would run the Hub task by default, from a list of nodes running the database you chose. -
Allow replication from Hub to Sink
Enable or Disable data replication from Hub to Sink. -
Allow replication from Sink to Hub
Enable or Disable data replication from Sink to Hub. -
Allow Replication Filtering
Toggle this ON if you want to choose which documents are allowed to be replicated.
Leave it toggled OFF if you want the entire database to be replicated. -
Save the new task or Cancel it.
- Save to create or update the task
You have to save the new task before you can continue configuring it. - Cancel to dismiss any changes or cancel task creation
- Save to create or update the task
-
Add Access
After saving the task, you can add as many accesses as you want.
Each access defines a connection to a Sink task, that uses the configuration you have provided in this page.
Access Configuration
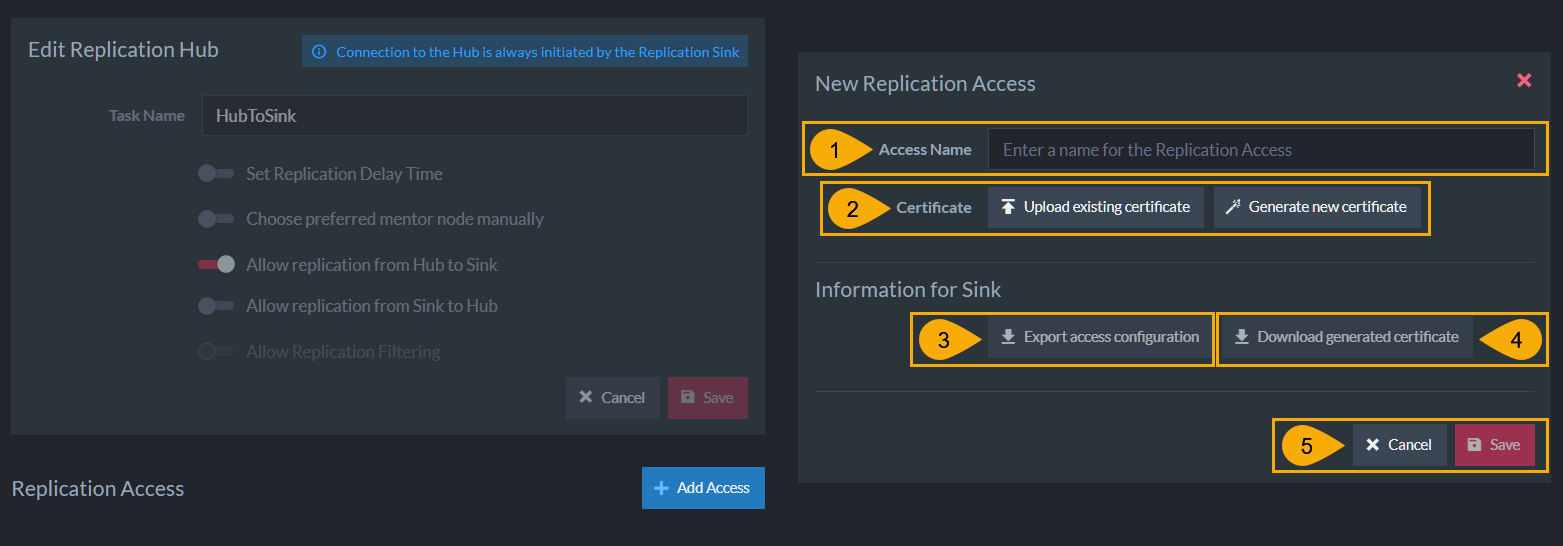
New Replication Access
-
Access Name
You can give the access whatever name you want. -
Certificate
Use one of the two options to issue the certificate that the Hub and Sink tasks would use to establish a secure connection.- Upload existing certificate
Choose this option if you prefer to import and reuse the certificate that is already used by the server to validate client access.
Choosing it will open a file explorer window and allow you to search for the certificate. -
Generate new certificate
Choose this option to create a new certificate that would be used only by this task and its Sinks.
Choosing to create a new certificate will open a page that would allow you to choose its longevity.

1. Choose how long the certificate would be valid before it expires.
2. Generate the new certificate or cancel the operation.
- Upload existing certificate
-
Information for Sink: Export access configuration
Choose this option to export your Hub configuration and make it available for import by Sink tasks, to save yourself the effort of retyping data you have already provided. -
Information for Sink: Download generated certificate
Choose this option to dump the certificate (whether you've issued or imported it) to a file, so you'd be able to import and use it from a Sink task.RavenDB prevents you from saving the access unless you download the certificate, because this is your last chance to get hold of the Private key (which the Hub doesn't keep when the access is saved).
-
Cancel / Save
Use this option to either create the new access or cancel its configuration.
Viewing and Editing Existing Accesses

Hub Access Details
Defined accesses are listed below the main Hub configuration page.
You can use this view to expand and collapse their details, edit accesses
and remove them.
Defining Filtered Replication
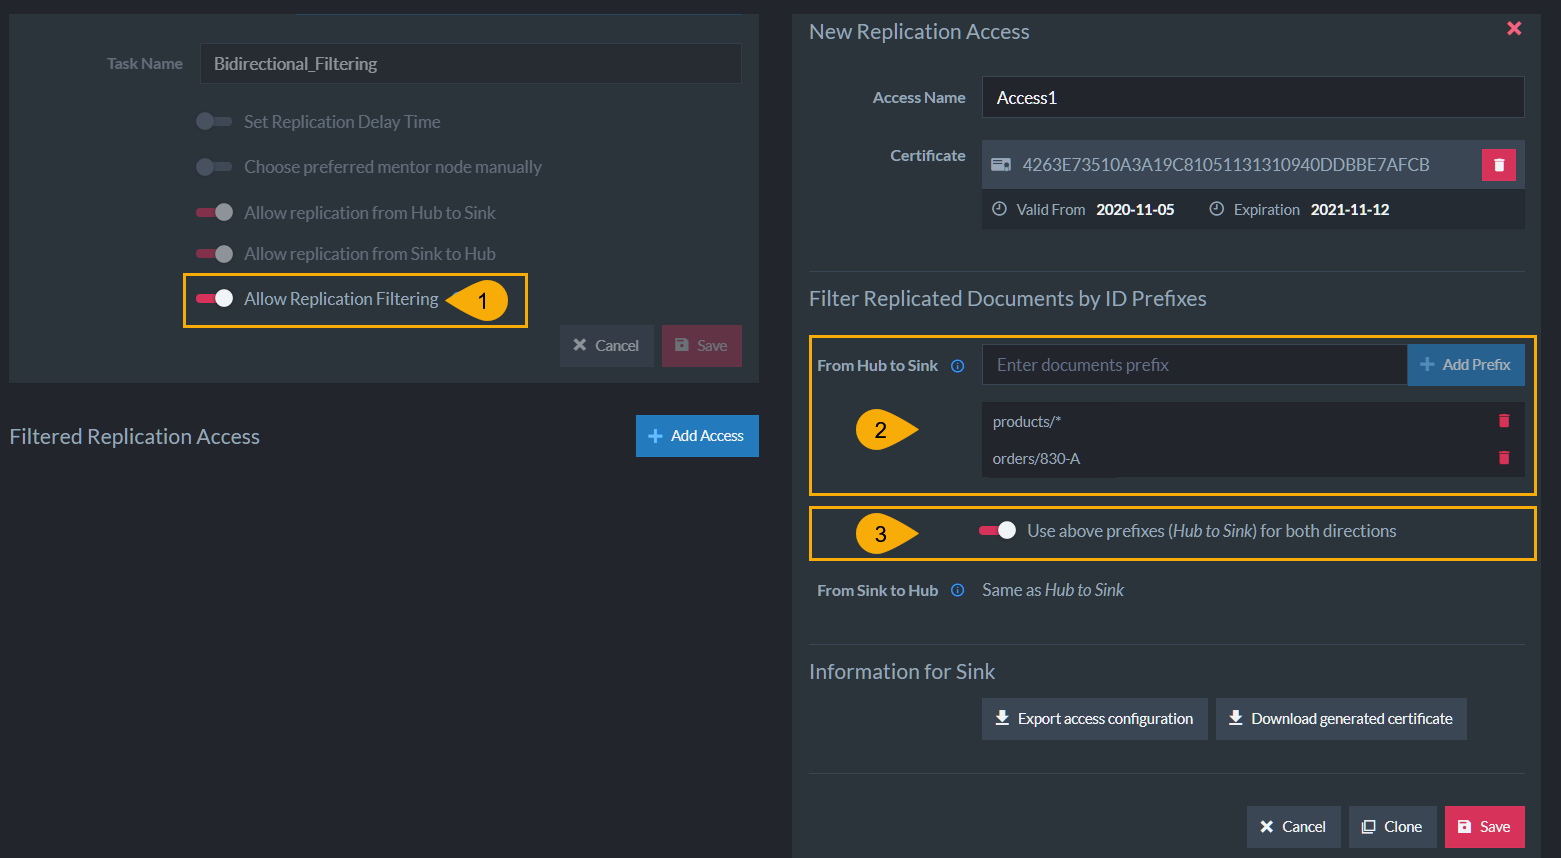
Defining Filtered Replication
-
Allow Replication Filtering
Toggle this ON to allow Filtered Replication. -
From Hub to Sink
Enter each path you want the Hub to replicate to the Sink, in theEnter documents prefixtext box. ClickAdd Prefixto add it to the prefix list.- You can define a prefix that uses a wildcard (
*).
Place the wildcard in the prefix' suffix, after/or-.
e.g.products/* - You can provide exact document IDs.
- You can define a prefix that uses a wildcard (
-
Use above prefixes (Hub to Sink) for both directions
- You can define a single list of prefixes, that would be used for
the filtering of both incoming and outgoing documents.
To define a single list, toggle the switch ON. -
You can also define two different prefix lists, one for incoming documents and another for outgoing documents.
You can use this, for example, to allow the reception of a document but not its delivery (or vice versa).
To define two separate lists, toggle the switch OFF.Note that only paths approved for replication by both the Hub and the Sink, will be replicated.
- You can define a single list of prefixes, that would be used for
the filtering of both incoming and outgoing documents.
Ongoing Tasks View
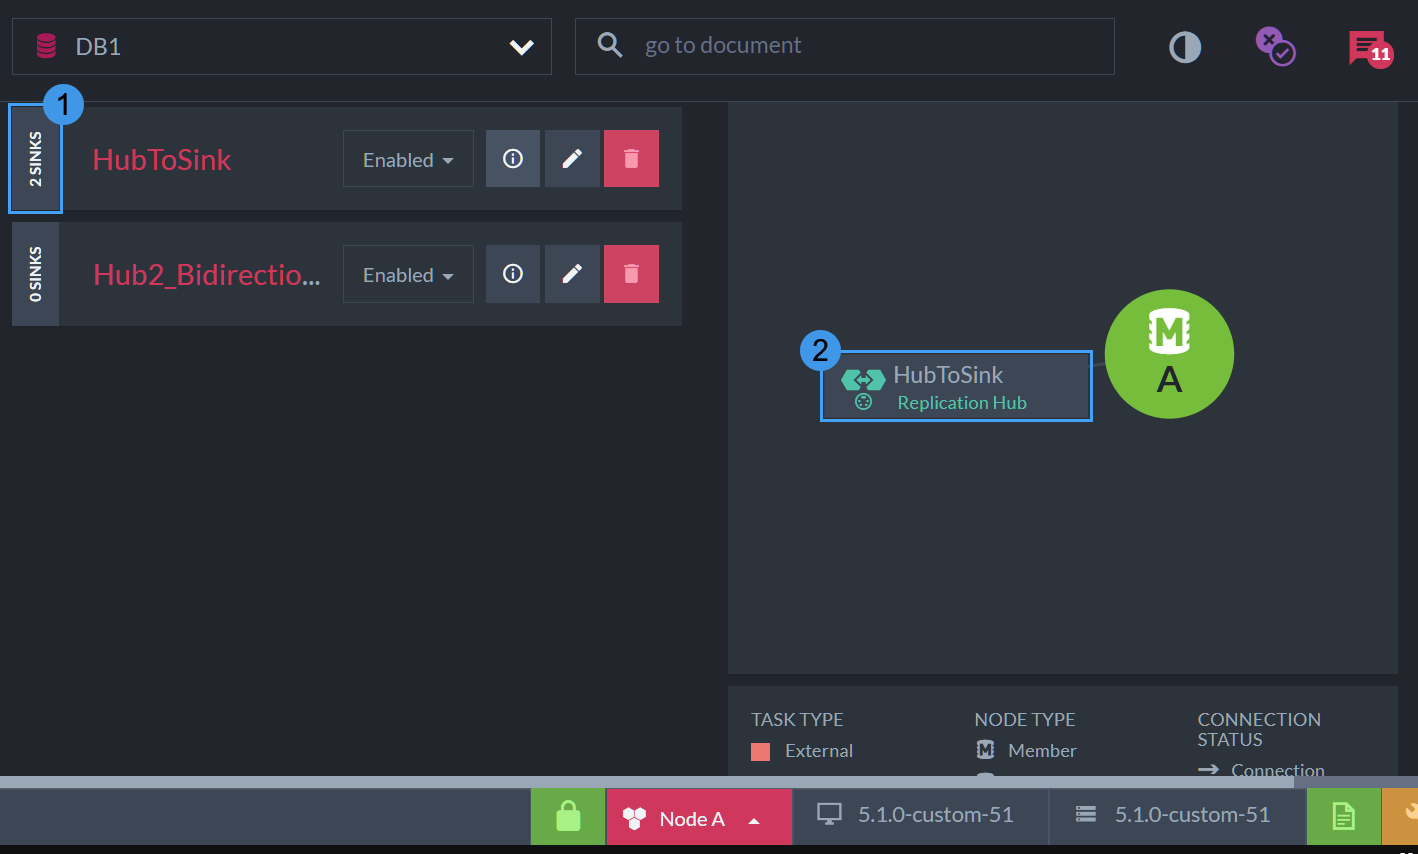
Ongoing Tasks View Info
-
Number of active sinks
The number of sinks currently connected to this Hub. -
Topology View
Show the task and its responsible node in the database group topology.

Ongoing Tasks View Buttons
- Enable/Disable task
- Edit task
- Delete task
- Info button
Click the Info button to show which Sink tasks are currently connected to this Hub.
